Knowing how to winterize a gazebo the right way is the difference between a structure that lasts for decades and one that crumbles under the weight of ice and neglect. The core process: clean every surface, seal exposed wood and metal, secure or store vulnerable components, and weatherproof your roof before the first hard freeze. Bookmark our complete gazebo winterization guide for a quick-reference checklist you can return to each season.
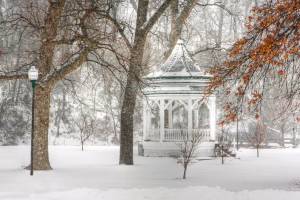
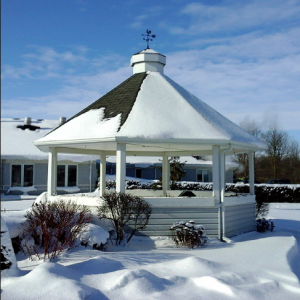
Winter is harder on outdoor structures than most homeowners expect. Freeze-thaw cycles open micro-cracks in untreated wood. Ice loading stresses roof panels that were never meant to carry that weight. Moisture trapped under cushions and inside metal joints triggers the kind of rust and rot that costs hundreds to fix in spring. An unprotected gazebo does not age gracefully — it deteriorates fast.
This guide covers every stage: why gazebos fail in cold weather, the exact steps that prevent it, how the approach shifts depending on your experience level, and the mistakes that undo all your preparation. If you are also getting your backyard ready for the cold season, the same principles behind winterizing an above ground pool apply here — systematic protection beats reactive repair every time.
Contents
What Cold Weather Does to an Unprotected Gazebo
Before you can protect your gazebo effectively, you need to understand exactly what you are protecting it against. Cold weather attacks outdoor structures through several distinct mechanisms — and each one requires a specific response.
The Mechanics of Freeze-Thaw Damage
Water expands by about 9% when it freezes. Any moisture that has worked its way into wood grain, metal joints, or roof seams does real structural damage when temperatures drop. The damage compounds over a season because each freeze-thaw cycle widens existing cracks slightly. By the time you notice splitting boards or loose fasteners, the damage is already significant.
The three biggest failure points in most gazebos:
- Post bases — where the post meets the concrete footing; water pools here and freezes around the base
- Roof panel seams — soft-top covers shift and crack; hardtop polycarbonate panels lose their seal
- Horizontal surfaces — railings, bench tops, and ledges hold standing water before and after storms
According to the Wikipedia article on weathering of wood, untreated exterior wood begins measurable degradation within the first year of exposure. Protecting wood before winter is not optional maintenance — it is structural preservation.
How Different Materials Respond to Winter
Not all gazebos need the same level of preparation. Your material dictates your workload. Use this table to understand your baseline requirements:
| Gazebo Material | Main Winter Vulnerability | Key Protection Step | Expected Prep Time |
|---|---|---|---|
| Pressure-treated pine | Cracking, checking, rot at joints | Annual waterproof sealant + post-base inspection | 4–6 hours |
| Cedar or redwood | Gray weathering, surface checking | Oil-based penetrating sealer every 1–2 years | 3–5 hours |
| Aluminum or steel | Surface rust, fastener corrosion | Clean, dry, touch up paint or rust-inhibiting primer | 2–3 hours |
| Vinyl or PVC | Brittle cracking in extreme cold | Remove and store decorative accessories; inspect for stress cracks | 1–2 hours |
| Soft-top fabric canopy | Mold, mildew, UV and ice loading tears | Remove cover, clean, store indoors or replace | 1–2 hours |
| Polycarbonate hardtop | Sealant failure at panel edges | Re-seal edges, clear snow loads promptly | 2–3 hours |
For more context on how your gazebo's shape and size factor into its winter vulnerability, see Gazebo Shapes and Sizes Explained — the roof pitch and panel count significantly affect how much water and ice loading your structure will face.
How to Winterize a Gazebo — Step by Step
This is the core of the process. Work through these steps in order — each one builds on the previous. Skipping ahead causes problems you won't notice until spring.
Start With a Deep Clean
You cannot seal dirty wood. Dirt, algae, and mildew residue block penetrating sealants from bonding properly. A thorough clean is the non-negotiable first step in any effective winterization.

Your cleaning checklist:
- Sweep the floor thoroughly — remove all leaf litter, debris, and dirt
- Mix a solution of warm water and mild dish soap or a dedicated outdoor wood cleaner
- Scrub all wood surfaces with a stiff-bristle brush, working with the grain
- Pay extra attention to horizontal surfaces where water and organic matter accumulate
- Rinse completely and allow 24–48 hours of drying time before applying any sealant
For algae and mildew, a diluted bleach solution (1 part bleach to 10 parts water) applied with a stiff brush and rinsed thoroughly is effective. Work on a cloudy day to prevent rapid evaporation before the solution can do its job.
Seal and Protect Wood and Metal
Once the wood is completely dry, apply a high-quality waterproof sealant to every exposed wooden surface. Do not skip the underside of horizontal boards — moisture wicks up from below just as readily as it soaks down from rain.
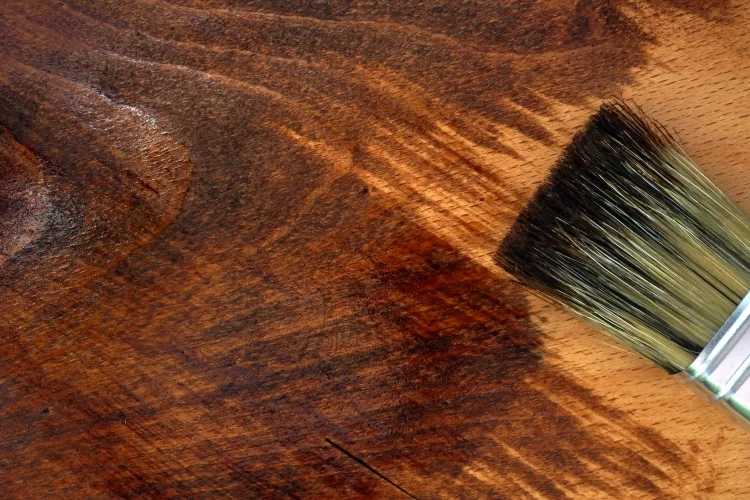
Key sealing steps:
- Choose a penetrating oil-based sealant for cedar and redwood; film-forming sealant for pressure-treated pine
- Apply two coats, allowing full drying time between applications
- Treat metal hardware (bolts, hinges, brackets) with a rust-inhibiting spray
- Tighten any loose fasteners before sealing — frozen wood and loose bolts are a bad combination
- Re-caulk any gaps at roof-to-post connections or where flashing meets wood
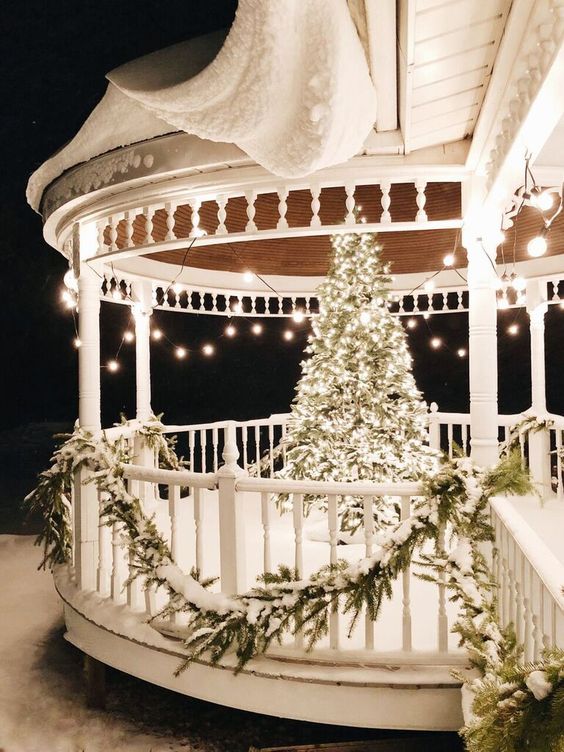
Secure the Roof and Frame
Your roof takes the most punishment during winter. Whether you have a soft-top canopy or a hardtop panel system, it needs direct attention.
For soft-top canopies:
- Remove the canopy entirely if possible — storage indoors is far better than leaving it exposed
- If you leave it in place, use a dedicated winter cover rated for snow load
- Brush off accumulated snow promptly — even light loads over time stress the frame
For hardtop panels:
- Inspect every panel edge for gaps in the sealant and re-seal with silicone caulk
- Check that drainage channels are clear of leaves and debris
- Examine the ridge cap and peak for any lifting or separation
Before sealing anything, always complete your structural inspection — a crack sealed over will trap moisture inside and accelerate the decay you are trying to prevent.
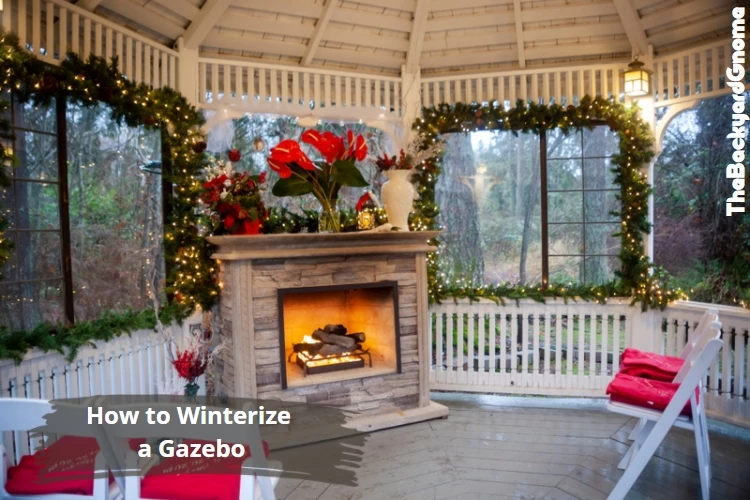
Add Winter Comfort Features
Winterizing does not mean closing your gazebo down for the season. With the right additions, it becomes usable well into cold weather.
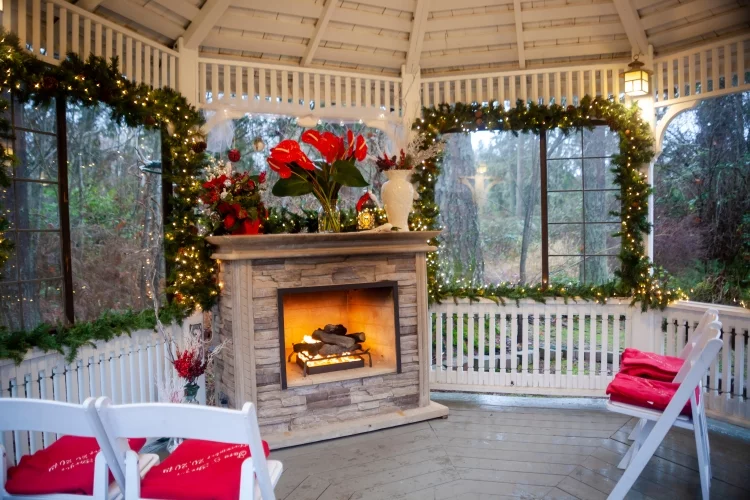
Practical winter comfort upgrades:
- Add a propane patio heater or electric infrared heater to extend usable hours
- Install weatherproof curtains on open sides to block wind and retain heat
- Lay outdoor rugs designed for cold climates to insulate the floor
- Use LED string lights rated for outdoor low-temperature use for ambiance without risk
If you plan on using your gazebo for cold-weather entertaining, read these outdoor winter party ideas — they pair perfectly with a properly winterized gazebo setup.
First-Time vs. Experienced Gazebo Owner
Your strategy shifts based on how many winters your gazebo has been through — and how many you have managed it through.
What to Focus on Your First Winter
If this is your first time winterizing, prioritize the fundamentals over everything else. Doing the basics well beats an incomplete attempt at advanced techniques.
Your first-winter priority list:
- Complete the full clean before any temperatures drop near freezing
- Apply sealant to all wood — one good coat is better than two rushed ones
- Remove cushions, fabric accessories, and anything that absorbs water
- Photograph the structure before and after — you will want the reference next year
- Note any soft spots in the wood or loose hardware for repair before spring
Do not get distracted by heating upgrades or decorative weatherproofing on the first pass. Structural protection comes first. Everything else is secondary until you have the core process locked in.
What Seasoned Owners Add to the Process
Owners who have been through several winters develop a more efficient, targeted approach. They know which parts of their specific structure take the most stress and prioritize accordingly.
What experienced winterizers add:
- A pre-season structural audit — they check every fastener, every joint, every post base
- Custom snow load solutions — roof props, snow rakes, additional support for wide spans
- Drainage improvements — slight re-grading around post bases to direct water away
- A maintenance log — tracking which sealant was used, when it was applied, and what needs attention next season
- Pre-ordered replacement hardware — they stock spare bolts, hinges, and sealant so repairs happen immediately rather than waiting on shipping
The maintenance log is the single biggest difference between first-timers and veterans. Patterns of wear become visible over multiple seasons, and that knowledge makes each subsequent winterization faster and more effective.
What Winterization Looks Like in Real Backyards
Abstract steps make more sense when you see them applied to specific situations. Here are two realistic scenarios that cover the most common gazebo types.
The Soft-Top Gazebo
You have a 10×12 aluminum-frame gazebo with a polyester canopy top purchased from a big-box retailer. This is the most common residential gazebo type, and it has the most straightforward winterization process.
What the process looks like:
- Remove the canopy fabric and hand-wash it with mild detergent
- Dry completely before storing — never store damp fabric in a sealed bag
- Wipe down the aluminum frame with a damp cloth; dry thoroughly
- Spray all metal joints and fasteners with a rust-inhibiting lubricant
- Cover the frame with a fitted gazebo winter cover, secured at the base
- Check mid-winter after any heavy snow or ice storm and clear any accumulation
Total time: 2–3 hours. Total cost: under $50 if you already own the winter cover.
The Hardtop or Permanent Structure
You have a cedar hardtop gazebo with polycarbonate roof panels, permanently anchored to a concrete pad. This structure needs more preparation, but it is built to last through winters with proper care.
What the extended process adds:
- Full wood treatment cycle — cleaner, brightener if needed, then two coats of sealant
- Roof panel inspection and re-sealing at every edge and peak joint
- Post-base waterproofing — apply hydraulic cement or roof flashing compound where posts meet concrete
- Furniture storage or covering — hardtop gazebos are often furnished, and that furniture needs equal protection
Total time: 6–8 hours spread across a weekend. This is the kind of structure worth that investment — a well-maintained cedar hardtop gazebo can last 20–30 years.
Mistakes That Cause Spring Damage
The most common gazebo repairs in spring all trace back to the same handful of preparation errors. Knowing these in advance means you won't make them.
Warning: Skipping the structural inspection before sealing is the single most expensive mistake you can make — you will seal moisture and rot inside the wood, and the damage will be far worse by spring.
Structural Oversights
- Not checking post bases — this is where water pools and freeze-thaw damage begins. Check every post base every season without exception.
- Ignoring loose fasteners — a loose bolt expands under frost pressure and splits the surrounding wood
- Leaving heavy furniture in place — furniture amplifies load stress on the floor and frame during ice and snow events
- Not clearing snow mid-season — soft-top frames in particular are not rated for sustained snow load
- Failing to inspect roof drainage — blocked gutters or drainage channels force water back under panel edges
Weatherproofing Shortcuts That Backfire
- Sealing over dirty or wet wood — the sealant forms a film instead of penetrating, and it peels off within the season
- Using interior wood sealant on exterior surfaces — it does not have the UV or moisture resistance for outdoor use
- Applying a single thin coat instead of two full coats — you get roughly 40% of the protection
- Storing fabric accessories in plastic bags before they are fully dry — mold forms within 24–48 hours
- Re-caulking over old caulk without removing the deteriorated material first — the new layer bonds to failing material and peels with it
The Right Time to Start — and When to Hold Off
Timing your winterization correctly matters as much as the steps themselves. Too late and you have already lost protection days. Too early and you may interrupt a sealant cure with unexpected rain.
The ideal window for wood sealing is three consecutive days above 50°F with no rain — check your extended forecast before you open the first can.
Signs You Should Start Now
Start your winterization process when you see any of these indicators:
- Overnight temperatures regularly dropping into the low 40s°F
- The last stretch of dry weather before a forecasted rainy or wet period
- Leaves finishing their fall — once leaf drop is complete, debris cleanup becomes stable
- Daytime temperatures still above 50°F — necessary for sealant to cure properly
- At least two weeks before your region's first expected hard freeze
In most temperate climates, this window falls in early-to-mid autumn. Do not wait for the first frost to trigger action — by then, optimal sealing conditions have usually passed.
When Waiting Makes Sense
There are legitimate reasons to delay parts of the process:
- If temperatures are still frequently above 70°F and nights are warm, sealant applied in high heat can bubble and fail to penetrate correctly
- If you are planning structural repairs, complete them before sealing — sealing around a repair area traps debris in the joint
- If a multi-day rain event is forecast within the next 48 hours, hold off on sealant application
- If your region does not experience hard freezes, your timeline is flexible — focus on pre-rainy-season prep instead
Understanding your specific gazebo type also informs timing. The roofline profile, panel count, and exposure of different structures affect how urgently each material needs attention — which is exactly why reviewing gazebo shapes and sizes is useful before you start planning your seasonal prep schedule.
Frequently Asked Questions
Do I need to remove my gazebo entirely for winter?
Only if it is a temporary or pop-up style structure not rated for cold weather. Permanent hardtop gazebos and most aluminum-frame structures are designed to stay in place year-round — they just need proper preparation. Remove the canopy fabric from soft-top models, but leave the frame standing with a fitted winter cover secured around it.
How often do I need to reseal a wooden gazebo?
Every one to two years for cedar and redwood in moderate climates. Pressure-treated pine in harsher climates benefits from annual resealing, particularly on horizontal surfaces that take the most weather exposure. Run a simple water-bead test in late summer: if water soaks in rather than beading up on the surface, it is time to reseal.
Can I still use my gazebo during winter after winterizing it?
Absolutely. A properly winterized gazebo with weatherproof curtains, a propane or electric patio heater, and outdoor-rated lighting can be a genuinely comfortable winter entertaining space. The winterization process protects the structure — it does not decommission it. Many homeowners find that a well-prepared gazebo becomes one of the most used spaces in their backyard during the colder months.
An hour of preparation in autumn is worth ten hours of repair in spring — protect your gazebo before winter asks whether you did.


About William Murphy
William Murphy has worked as a licensed general contractor in Fremont, California for over thirty years, specializing in outdoor structures, green building methods, and sustainable design. During that career he has written about architecture, construction practices, and environmental protection for regional publications and trade outlets, bringing technical depth to subjects that most home improvement writers approach only from a consumer perspective. At TheBackyardGnome, he covers outdoor product reviews, backyard construction guides, and sustainable landscaping and building practices.
You can Get FREE Gifts. Receive Free Backyard Items here. Disable Ad Blocker to get them all now!
Once done, hit anything below