A reflecting telescope works by using curved mirrors — not glass lenses — to gather and focus light from distant objects. That mirror-based design is exactly why reflectors dominate everything from suburban backyards to the world's largest observatories. Whether you're new to stargazing or sharpening your knowledge, our astronomy guides cover the full picture of what's out there and how to see it.

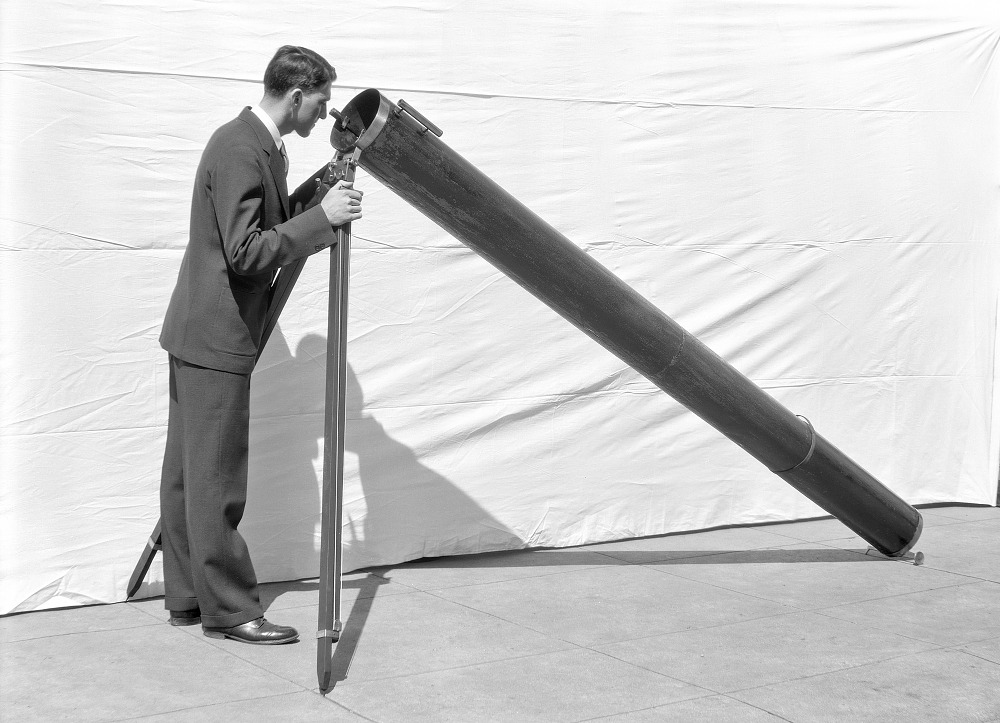
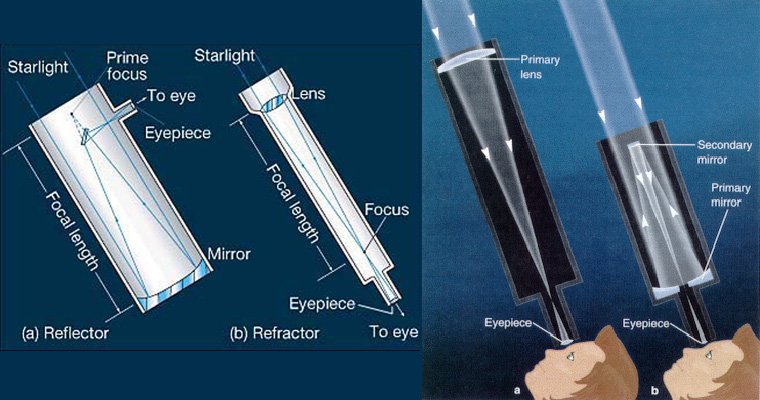
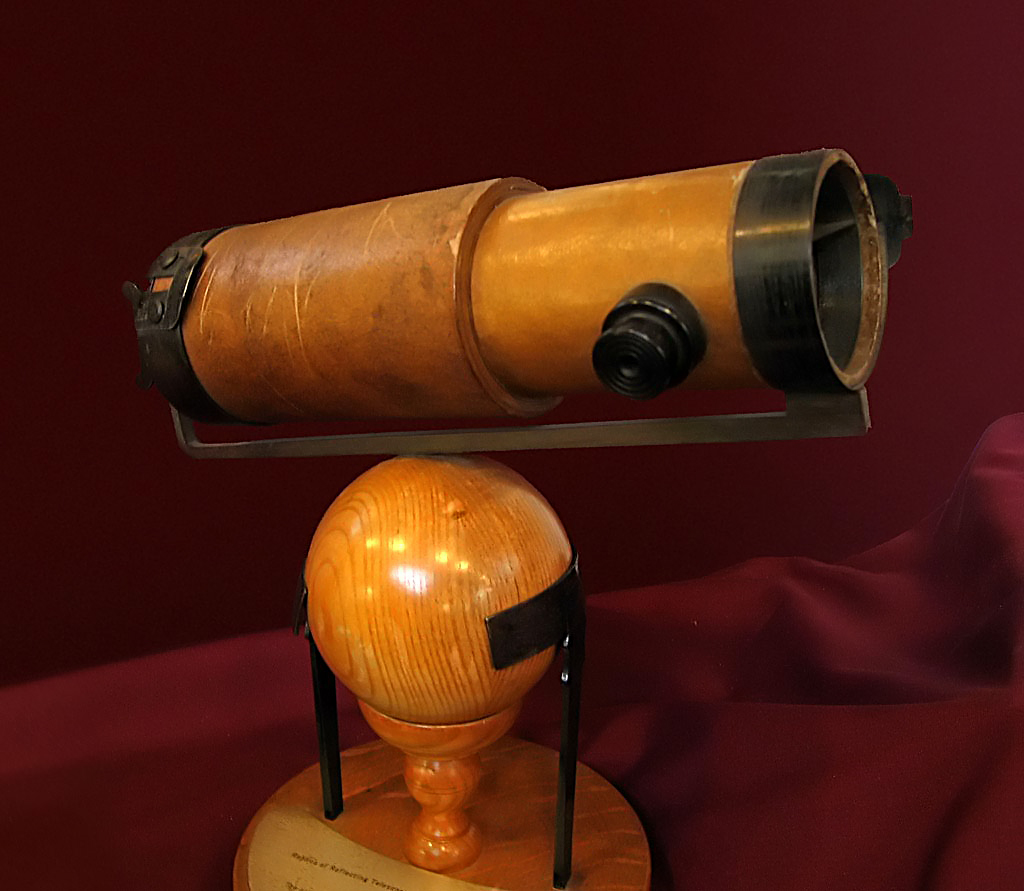
Isaac Newton built the first practical reflecting telescope in 1668, and the core idea hasn't changed much since. Light enters the open end of the tube, travels down to a large concave (bowl-shaped) primary mirror at the bottom, bounces back up toward a small flat secondary mirror angled at 45 degrees, and gets redirected out through an eyepiece on the side of the tube. That's the whole optical system. Understanding how do reflecting telescopes work at this basic level immediately helps you make smarter buying decisions and troubleshoot problems yourself instead of guessing.
The design solves a real problem that plagued early astronomers. Lens-based telescopes bend different wavelengths of light at slightly different angles, producing a blurry rainbow fringe around objects — a flaw called chromatic aberration. Mirrors reflect all wavelengths equally, so your view is cleaner. That advantage becomes enormous as aperture (the diameter of the light-gathering surface) increases, which is why the world's biggest telescopes all use mirrors.
Contents
Reflectors vs. Refractors: The Core Differences
How Mirrors Beat Lenses for Most Backyard Astronomers
The single biggest difference between a reflecting telescope and a refracting telescope is the main optical element doing the work. A refractor uses a precisely ground glass objective lens mounted at the front of the tube. A reflector uses a curved mirror at the back. Both designs gather light and focus it to a point where your eyepiece magnifies the image, but mirrors do it more efficiently at larger sizes — and larger size means more light, which means sharper and brighter views of the objects most people actually want to see.
Mirrors are far cheaper to manufacture at large diameters than high-quality glass lenses. A 6-inch mirror costs a fraction of what a 6-inch apochromatic (color-corrected) lens would run you. That means reflectors consistently deliver more aperture per dollar than any other design. If you want to understand how the lens-based alternative handles these same optical challenges, our breakdown of how a refracting telescope works covers the full comparison from the other side.
A Direct Comparison
| Feature | Reflecting Telescope | Refracting Telescope |
|---|---|---|
| Primary optic | Curved mirror | Glass objective lens |
| Chromatic aberration | None | Yes (unless apochromatic) |
| Best targets | Nebulae, galaxies, star clusters | Moon, planets, bright doubles |
| Aperture per dollar | Excellent | Poor at large sizes |
| Maintenance | Collimation required periodically | Nearly maintenance-free |
| Typical tube length | Shorter relative to focal length | Longer relative to focal length |
Picking a Reflector for Your Experience Level
What Beginners Should Look For
If you're just starting out, a Newtonian reflector in the 114mm to 130mm aperture range is a smart first scope. The Newtonian is the most common reflector design — it's what Newton invented, and it remains the most affordable and well-supported option on the market. You get enough light-gathering power to see the moon in stunning detail, Saturn's rings as a distinct oval shape, Jupiter's cloud bands, and dozens of bright deep-sky objects.
Pro tip: For your first telescope, aperture matters far more than magnification. A wider mirror gathers more light — and that's what actually reveals faint objects, not how much the eyepiece zooms in.
Look for a scope with a focal ratio (the ratio of focal length to aperture, written as f/8 or f/6) between f/6 and f/10. This range is forgiving of eyepiece quality and atmospheric conditions. Stick with a simple equatorial or alt-azimuth mount — nothing motorized yet — so you learn to actually navigate the sky yourself first.
When to Step Up to Something More Advanced
Once you can reliably find objects, collimate your mirrors, and understand what you're looking at, more aperture opens a new world. This is where Dobsonian reflectors become very appealing. A Dobsonian is a Newtonian reflector on a simple rocker-box base that pivots up-down and left-right. The design trades motorized tracking for sheer mirror size — you can own a 10-inch or 12-inch Dobsonian for what a modest 4-inch refractor costs. Our in-depth guide on how a Dobsonian telescope works explains the mechanical advantages and what you can realistically expect to see through one.
The Mistakes Most New Owners Make
Skipping Collimation
Collimation is the process of aligning your primary and secondary mirrors so the optical axis runs perfectly straight through the eyepiece. When mirrors fall out of alignment — which happens from vibration, transport, and temperature changes — images go soft and blurry. Every star looks like a comet. Many beginners blame their scope's quality when the actual problem is uncollimated optics.
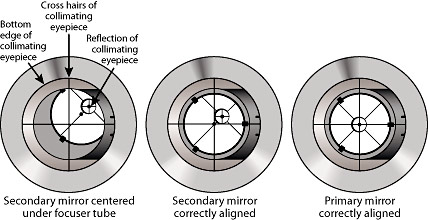
A basic understanding of collimation geometry helps you see why the adjustment matters. In practice, a $10 collimation cap makes the process straightforward. Check alignment every time you transport the scope and at least every few sessions even when it stays put. Once you've done it a few times, the whole process takes under five minutes.
Warning: Don't collimate immediately before going out to observe — do it earlier in the day so you're not rushing in the dark, and so your eyes are fully dark-adapted when you're ready to look.
Other Common Slip-Ups
The second most common mistake is skipping cool-down time. Your mirror is a large thermal mass — when you bring a cold scope inside or carry a warm scope outside, it takes 20 to 45 minutes for the mirror to match the surrounding air temperature. Until it stabilizes, convection currents shimmer above the mirror's surface and blur every image. Take the scope outside before dark and let it acclimate while you plan your session.
The third mistake is chasing maximum magnification immediately. Always start at your lowest power eyepiece to locate and center an object before reaching for higher magnification. High power amplifies every wobble, thermal shimmer, and alignment error. The atmosphere itself limits useful magnification to around 50x per inch of aperture on a good night — more than that, and you're just magnifying blur.
The Gear That Makes It All Work
Eyepieces and Magnification
Your scope probably ships with one or two basic eyepieces. They're serviceable, but a quality 25mm wide-field eyepiece and a 10mm planetary eyepiece cover 90% of what you'll want to do. Magnification is simply the telescope's focal length divided by the eyepiece's focal length — so a 1000mm scope with a 25mm eyepiece delivers 40x magnification. That math never changes, and understanding it lets you build your eyepiece collection with intention instead of impulse.
Tip: A 2x Barlow lens effectively doubles every eyepiece you own — it's one of the best value accessories in astronomy and typically costs less than a single quality eyepiece.
Mounts: The Unsung Hero
The mount holds your telescope steady while the Earth rotates underneath it — and a shaky mount ruins even the finest optics. Equatorial mounts (EQ mounts) tilt on one axis parallel to Earth's rotation, making it simple to track an object with a single slow motion control. Alt-azimuth mounts (alt-az) move straight up-down and left-right, which is more intuitive for casual visual observing. Match the mount to how you plan to use the scope. If astrophotography is ever a goal, an equatorial mount is non-negotiable from the start. For pure visual observing, alt-az mounts are simpler, lighter, and faster to set up — and that matters more than you might expect on a cold night.
What a Reflecting Telescope Actually Costs
Entry-Level Budgets

A capable entry-level Newtonian reflector starts around $100–$150. At this price range you're looking at 76mm to 127mm aperture, a basic mount, and one or two eyepieces. These are real optical instruments — not toys — and they'll show you lunar craters, Saturn's rings as a clear oval shape, Jupiter's four bright moons, and the Andromeda Galaxy as a faint smear of light on a dark night.
Mid-Range and Beyond
Spend $200–$400 and you move into the 130mm to 150mm range with noticeably better mounts and mirror coatings. At $400–$800, you're looking at 6-inch to 8-inch Dobsonians that can resolve individual stars in globular clusters, show dust lanes in nearby galaxies, and track comets across the sky. Beyond $1,000, you're in serious amateur astronomy territory — motorized equatorial mounts, GoTo computer systems, and large-aperture instruments that match what professional observatories used just a few decades ago. The $200–$400 range is where most backyard astronomers find the best balance of performance, portability, and price.
Frequently Asked Questions
What is the main advantage of a reflecting telescope over a refracting telescope?
Reflecting telescopes deliver far more aperture per dollar because large mirrors are cheaper to manufacture than large glass lenses. They also eliminate chromatic aberration entirely, giving you a cleaner image — especially useful when observing faint deep-sky objects like nebulae and galaxies.
Do reflecting telescopes need maintenance?
Yes. The primary task is collimation — realigning the mirrors when they drift out of position. You should also periodically clean the mirrors using a gentle method (distilled water and a soft cloth). Beyond that, reflecting telescopes are straightforward to maintain.
What can you see with a basic reflecting telescope?
Even a budget 114mm Newtonian reflector will clearly show lunar craters, Saturn's rings, Jupiter's cloud bands and four largest moons, Mars as a small reddish disk, and dozens of bright deep-sky objects including the Orion Nebula and the Andromeda Galaxy.
How often should I collimate my reflecting telescope?
Check collimation every time you transport the scope and every few sessions even if it hasn't moved. Temperature changes and minor vibrations are enough to shift mirror alignment over time. Once you learn the process it takes less than five minutes.
What aperture should a beginner look for in a reflecting telescope?
For a first telescope, a 114mm to 130mm aperture Newtonian reflector is an excellent starting point. It gathers enough light to reveal real astronomical objects without being too large or expensive, and the collimation process at that size is straightforward to learn.
Is a reflecting telescope good for astrophotography?
Reflectors can be excellent for astrophotography, but the mount matters as much as the optics. You need a motorized equatorial mount that can track the sky with precision during long exposures. A basic alt-azimuth mount works for visual observing but will produce star trails in photos beyond very short exposures.
Next Steps
- Pick a budget and find a 114mm–130mm Newtonian reflector in that range — read reviews on Cloudy Nights forum before buying to confirm the mount quality matches the optics.
- Download a free star-chart app like Stellarium so you know exactly what objects are visible from your location before your first night out.
- Watch two or three collimation tutorials specific to your telescope model so you can properly align the mirrors before your first session, not after.
- Plan your first observing session around the moon — it's the most forgiving target, rewards any aperture, and teaches you how to focus and track an object without frustration.
- After a few sessions, revisit the astronomy section here to explore next steps like eyepiece upgrades, Dobsonians, and astrophotography basics.


About Simmy Parker
Simmy Parker holds a Bachelor of Science in Civil Engineering from Sacramento State University and has applied that technical background to outdoor structure design, landscape planning, and backyard improvement projects for over a decade. Her love for the outdoors extends beyond design — she regularly leads nature hikes and has developed working knowledge of native plants, soil conditions, and sustainable landscaping practices across Northern California. At TheBackyardGnome, she covers backyard design guides, landscaping ideas, and eco-friendly outdoor living resources.
You can Get FREE Gifts. Receive Free Backyard Items here. Disable Ad Blocker to get them all now!
Once done, hit anything below