The first time I fired up my chiminea for a real cookout, I had no cooking rack, no plan, and exactly zero idea what I was doing. I skewered some chicken thighs on a wire coat hanger and held them over the flame like a caveman. The result? The smokiest, most flavorful chicken I'd ever eaten in my own backyard. That happy accident hooked me completely. Cooking with a chiminea is one of the most satisfying things you can do outdoors — and it's easier than most people think. If you're ready to take your outdoor cooking to the next level, this guide covers everything you need to know.
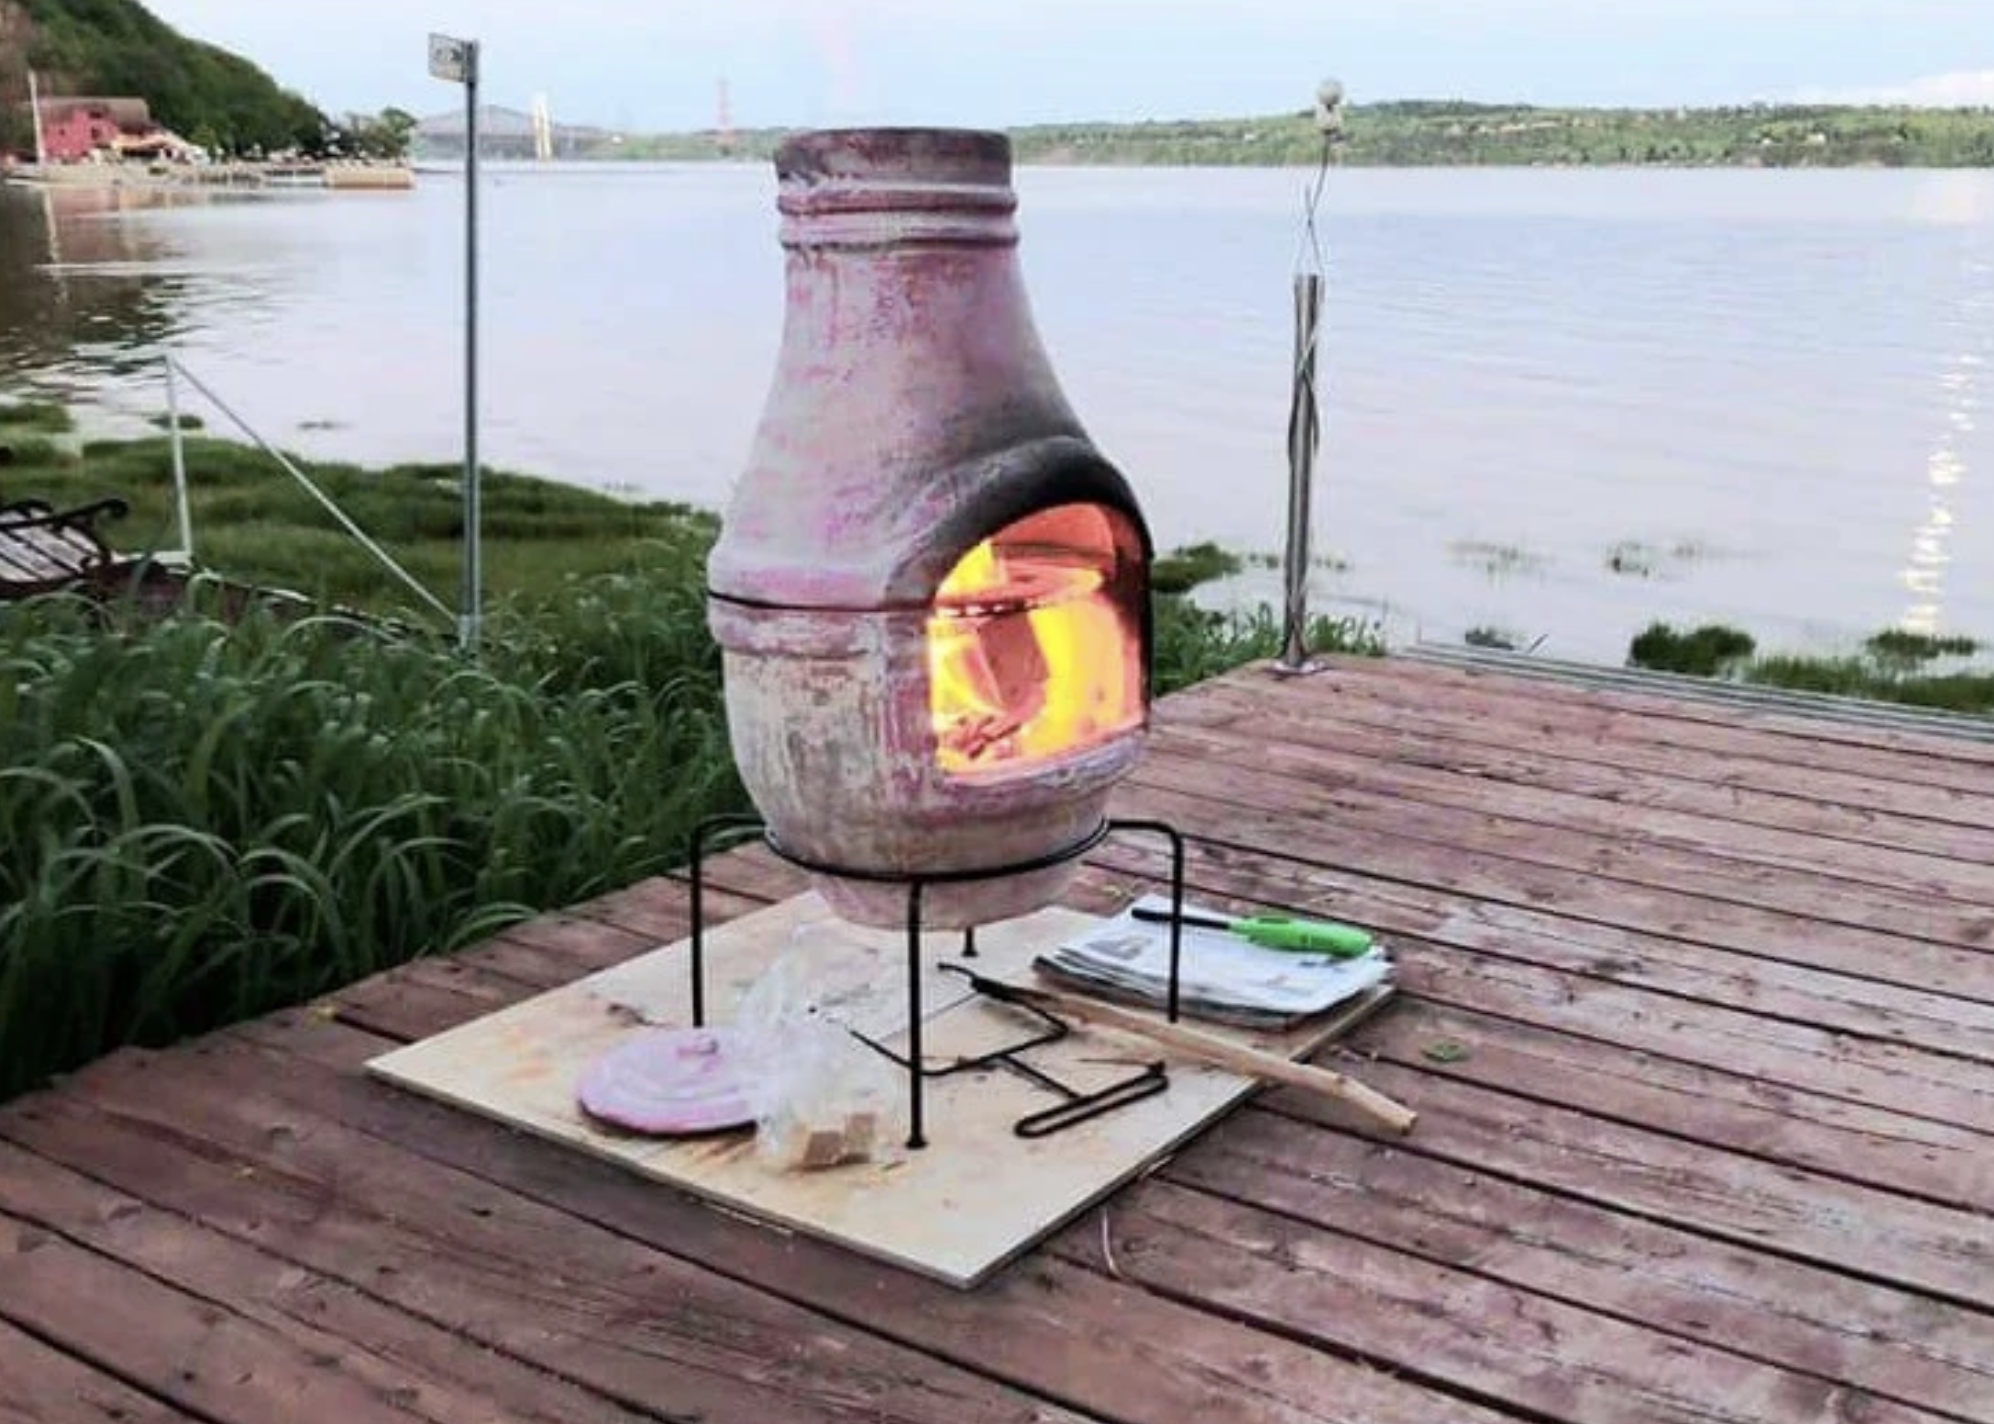
A chiminea (also spelled "chimenea") is a front-loading, freestanding outdoor fireplace with a round belly and a tall chimney. The design originated in Mexico and has been used for centuries for both heat and cooking. That chimney isn't decorative — it draws smoke upward and away from you, so you can actually stand close enough to tend your food without tearing up.
Clay, cast iron, and steel are the three main materials you'll encounter. Each one handles heat differently, and that directly affects how and what you cook. This guide breaks down all three, walks you through the whole cooking process step by step, clears up the myths that keep people from getting the most out of their chimineas, and gives you a gear list that makes everything easier from day one.
Contents
- Clay vs. Cast Iron vs. Steel: Which Is Best for Cooking?
- What Cooking With a Chiminea Actually Costs You
- How to Cook With a Chiminea: A Step-by-Step Guide
- Chiminea Cooking Myths — Busted
- When Chiminea Cooking Shines (And When to Skip It)
- Tips That Will Level Up Your Chiminea Cooking
- Essential Gear for Cooking With a Chiminea
- Frequently Asked Questions
- Final Thoughts
Clay vs. Cast Iron vs. Steel: Which Is Best for Cooking?
Not all chimineas cook the same. The material determines heat-up time, heat retention, maintenance requirements, and how long the unit lasts. Here's the side-by-side breakdown so you can make the right call before you buy.
| Material | Heat-Up Time | Heat Retention | Durability | Best For | Price Range |
|---|---|---|---|---|---|
| Clay | 20–30 min | Moderate | Fragile if not cured | Slow cooking, ambiance | $50–$200 |
| Cast Iron | 30–45 min | Excellent | Very high | High-heat grilling, Dutch oven | $200–$600 |
| Steel | 10–15 min | Low | Moderate (rusts easily) | Quick fires, light cooking | $80–$250 |
Clay Chimineas
Clay is the traditional choice and still the most popular. It radiates warm, even heat, looks beautiful in any backyard, and carries that authentic character no other material matches. The trade-off? Clay cracks easily if you skip the curing process or expose it to sudden temperature changes. Cure it properly and it'll reward you for years.
- Best for low-and-slow cooking — whole vegetables, foil packets, corn on the cob
- Requires 3–5 small curing fires before full use
- Needs a waterproof cover and dry storage in wet climates
- Never use charcoal — the heat intensity will crack the clay
For a full deep-dive into keeping your clay model in top condition, read our guide to clay chiminea care.
Cast Iron Chimineas
Cast iron is the serious cook's pick. It holds heat longer than any other material, gets genuinely hot, and handles everything from direct grilling to Dutch oven cooking without complaint. The Blue Rooster Cast Iron Casita chiminea is a prime example — built to last decades and exceptionally capable once it reaches temperature.
- Slow to heat up, but maintains temperature brilliantly once there
- Very heavy — decide on placement before you fill it with fire
- Requires seasoning (like a cast iron skillet) to prevent surface rust
- The best long-term investment if you cook outdoors regularly
Steel Chimineas
Steel heats fast and costs less than the alternatives. It works fine for occasional fires and light cooking sessions. But steel doesn't retain heat well, and it rusts quickly without consistent upkeep. Think of a steel chiminea as the entry point to the hobby — not the destination.
- Good starting point if you're not ready to commit to a bigger investment
- Apply high-temperature paint annually to slow corrosion
- Not recommended for extended or high-heat cooking
What Cooking With a Chiminea Actually Costs You
The sticker price of the chiminea is just the beginning. Here's what a realistic setup actually costs, so you're not surprised after checkout.
Upfront Costs
- Chiminea unit: $50–$600 depending on material and brand
- Cooking grate or rack: $15–$50 — most clay models don't include one
- Fire-starting supplies: $10–$20 for kindling, newspaper, and fire starters
- Heat-resistant gloves: $15–$30
- Stand or heat pad: $20–$60 if not included with your unit
- Weather cover: $20–$40
A solid clay chiminea starter setup — unit, basic accessories, and cover — runs around $150–$250 all in. If you go cast iron, budget $350–$700. For context on how chimineas stack up against other backyard fire options, our roundups of best luxury fire pits and best outdoor fireplaces are worth a look.
Ongoing Costs
- Firewood: $5–$15 per cooking session depending on your region and wood type
- Clay sealant: $10–$20 per year to protect against moisture damage
- Replacement grates: every 1–3 seasons with regular use
- Cast iron seasoning oil: minimal — a small bottle lasts a full season
Over a full season of regular use, expect to spend $50–$100 on wood and consumables. That's comparable to running a charcoal grill — but the experience is far more memorable. Our chiminea care and maintenance guide breaks down exactly what upkeep looks like from season to season.
Pro tip: Buy seasoned hardwood in bulk at the start of the season — oak, hickory, or apple wood. You'll pay less per bundle and get a hotter, cleaner burn than bagged convenience-store wood.
How to Cook With a Chiminea: A Step-by-Step Guide
There's a right order of operations here. Cooking with a chiminea isn't complicated, but skipping steps leads to uneven heat, cracked clay, or food that tastes like ash. Follow this process and you'll be eating well inside an hour.
Building the Fire
- Place your chiminea on a stable, heat-safe surface. Keep it at least 10 feet from your home, fences, and any overhead branches.
- Add a 2–3 inch layer of sand or gravel to the bowl base. This protects the bottom from direct flame heat and improves airflow. Never skip this step with a clay model.
- Build a small teepee of kindling in the center of the bowl, with two or three small logs positioned around it.
- Light the kindling through the front opening using a long match or lighter. Skip the lighter fluid — it causes dangerous flare-ups and can thermally shock a clay chiminea.
- Let the fire run for 15–20 minutes before adding more wood or any cooking equipment. You want a solid coal bed, not raw flame, to cook over.
- Add your cooking grate once the fire has established and you can see glowing coals.
Cooking Methods
Once you have your coal bed, you've got several solid options depending on what you're making:
- Direct grilling: Set a grate over the opening and cook steaks, sausages, fish, or vegetables directly over the coals. Best for cast iron and steel models with wider openings.
- Skewers: Thread food onto long metal skewers and rest them across the opening or on a skewer rack. Works great for shrimp, chicken pieces, and peppers.
- Foil packets: Wrap potatoes, corn, or seasoned vegetables in heavy-duty foil and nestle them directly in the coals. Nearly impossible to mess up.
- Dutch oven cooking: Place a cast iron Dutch oven with legs directly on the coals for soups, stews, and chilis. Cast iron chimineas are especially well-suited for this method.
- Open roasting: Whole ears of corn, bananas, and marshmallows all roast beautifully with minimal setup.
According to the USDA's food safety guidelines, meat cooked over open fire should hit safe internal temperatures — 165°F for poultry, 145°F for whole cuts of pork and beef. An instant-read thermometer removes all the guesswork.
Chiminea Cooking Myths — Busted
A lot of people use their chiminea as a fire pit for one season, then give up on cooking because of bad information they've absorbed somewhere. Let's set the record straight.
- Myth: "You can only toast marshmallows over a chiminea."
False. You can grill steaks, roast whole vegetables, simmer stews in a Dutch oven, and bake flatbread in one. The heat is actually more controllable than an open fire pit because the enclosed body moderates airflow. - Myth: "Clay chimineas are too fragile for regular cooking."
A properly cured clay chiminea handles regular cooking use without issue. The fragility people experience almost always comes from rushing the curing process or using charcoal instead of wood. - Myth: "Chimineas produce too much smoke to cook around."
A well-built fire with dry hardwood produces very little smoke. Excessive smoke is almost always a wet wood or airflow problem — both completely fixable. - Myth: "You need special expensive accessories to cook on one."
You need a grate and a good fire. That's genuinely it. Everything else is optional. - Myth: "Chimineas are just decorative pieces."
For a direct comparison with other backyard fire options, check out the best sunken fire pit ideas — chimineas hold their own as a fully functional cooking tool.
Warning: Never use charcoal briquettes in a clay chiminea. They burn significantly hotter than wood and will crack the clay. Stick exclusively to seasoned hardwood.
When Chiminea Cooking Shines (And When to Skip It)
A chiminea is not the right tool for every cooking situation. Know when it makes sense and when to grab a different piece of equipment.
Best Scenarios
- Cooler evenings: The radiant heat warms your guests while you cook. It's functional and atmospheric at the same time — a combination nothing else quite matches.
- Small to medium gatherings: Cooking for 2–8 people is the sweet spot. The opening size and fire capacity are naturally suited to intimate dinners.
- Casual one-pot meals: Stews, chilis, and soups in a Dutch oven are perfect chiminea food. Low maintenance, big payoff.
- Desserts: Banana s'mores, grilled peaches, campfire cones — the chiminea makes dessert effortless and memorable.
- Weeknight dinners: Once you've got your fire management down, you can have a cook-ready coal bed in under 25 minutes. That's faster than charcoal.
When to Use Something Else
- Feeding a large crowd: The cooking area is limited. For 12 or more people, a full grill or outdoor fireplace handles volume better. See our roundup of best outdoor fireplaces for options that scale up.
- High-wind days: Wind disrupts the chimney draw and can scatter embers. Either position the opening away from the prevailing wind or wait for a calmer day.
- Active rain: Cold rain hitting a hot clay chiminea risks cracking. Cast iron and steel weather it better, but all chimineas should be covered when not in use.
- Precision long-cook recipes: Whole smoked brisket or spatchcocked turkey needs controlled, sustained temperatures. A chiminea isn't a smoker — don't try to force it into that role.
Tips That Will Level Up Your Chiminea Cooking
These are the small habits that separate frustrating chiminea sessions from genuinely great ones. Most cost nothing — just a little attention.
- Use only dry, seasoned hardwood. Oak, hickory, apple, or cherry. Green (freshly cut) wood produces too much smoke and won't build a proper coal bed.
- Preheat your grate before adding food. Let it sit over the fire for 3–5 minutes first. You'll get better sear marks and nothing will stick.
- Control heat with wood size — not airflow. Smaller pieces for more heat, larger logs for longer sustained heat. You don't have a damper, so manage it through what you feed the fire.
- Keep a spray bottle of water nearby. A quick spritz tames flare-ups without smothering your coals.
- Oil cast iron grates after every session. While they're still warm, wipe on a light coat of vegetable oil. They'll last far longer and stay non-stick.
- Rotate foil packets halfway through. Coals heat unevenly. One flip prevents burned bottoms and raw tops.
- Cook over coals, not flames. Wait until the wood has broken down into glowing orange coals. That's your actual cooking heat — consistent, controllable, and far more useful than active flame.

Banana s'mores deserve their own mention. Split a banana lengthwise (leave the peel on), stuff the inside with mini marshmallows and chocolate chips, wrap it in heavy-duty foil, and nestle it in the coals for about 5 minutes. It comes out warm, gooey, and completely crowd-pleasing with almost no cleanup. Pair a few with a round of tiki-inspired drinks and you've built a full backyard event around almost nothing.
Essential Gear for Cooking With a Chiminea
You don't need much to get started. But the right tools make a real difference — especially around an open fire where the margin for error is lower.
Must-Have Tools
- Cooking grate or grilling rack: Round grates sized to fit your chiminea's opening are the most practical. Measure the opening diameter before you buy anything. Cast iron chimineas often include a grate — clay models almost never do.
- Long-handled tongs (16–18 inches): Standard 12-inch grill tongs don't keep your hands far enough from the heat. Go longer.
- Heat-resistant gloves: Not optional. The chiminea body gets extremely hot during use. Accidents happen when you're adjusting wood or repositioning food.
- Instant-read thermometer: The most important food safety tool you can own when cooking over open fire.
- Fire poker or long-handled stoker: For adjusting wood and coal positions without reaching into the fire.
Nice-to-Have Extras
- Cast iron Dutch oven with legs: The legs let it sit directly on your coal bed. Game-changing for one-pot meals and worth every penny.
- Skewer rack: Holds multiple skewers at the right height over the fire without you standing there holding them the whole time.
- Pizza stone: Yes, you can make pizza. A stone on the grate inside the chiminea gets hot enough for a credible wood-fired thin crust. It's legitimately impressive.
- Chimney starter: Gets your fire going in 15 minutes without lighter fluid, if your chiminea's opening is wide enough to use one.
- Ash scoop and metal bucket: Cleaning out cold ash is part of the routine. A small metal scoop and a non-combustible bucket make it quick and safe.
Once your chiminea setup is dialed in, the rest of your outdoor space matters more. Our guide to best patio conversation sets covers seating arrangements that work well around a central fire feature — worth reading if you're building out the whole space.
Frequently Asked Questions
Can you really cook food in a chiminea?
Yes, absolutely. A chiminea is a contained outdoor fire with a chimney that draws smoke away from you. With a proper grate and dry hardwood, you can grill, roast, simmer, and even bake over one. It's not a replacement for a full outdoor kitchen, but for everyday backyard cooking it's more than capable.
What foods cook best in a chiminea?
Sausages, steaks, chicken thighs, corn on the cob, whole vegetables, and Dutch oven stews all do very well. Foil packets are nearly foolproof. For desserts, banana s'mores and grilled peaches are crowd favorites. Avoid anything that requires precise temperature control over a long period, like a whole smoked brisket.
Do I need a special grate for cooking in a chiminea?
You need a grate sized to fit your specific chiminea's opening diameter. Cast iron models often come with one included. For clay and steel models, measure your opening before buying. Some brands sell matched accessory kits — those tend to fit best and are worth the convenience.
Is it safe to cook in a clay chiminea?
Yes, provided you cure it properly first. A new clay chiminea must go through three to five progressively larger fires before full cooking use. This process strengthens the clay gradually and prevents cracking. Once cured correctly, it handles regular cooking without any issues. The one firm rule: never use charcoal in a clay chiminea.
What wood should I use for cooking in a chiminea?
Use dry, seasoned hardwood. Oak, hickory, apple, and cherry are your best options. They burn hot, produce minimal smoke, and add subtle flavor to food. Avoid softwoods like pine — they pop and spark excessively, burn too quickly, and leave behind creosote deposits. Never use wet or freshly cut green wood.
How long does it take a chiminea to be ready for cooking?
Plan for 20–30 minutes for clay, 30–45 minutes for cast iron (which holds heat much longer once hot), and 10–15 minutes for steel. Remember — you're not cooking over flames. You're cooking over the coal bed that forms as the fire matures. Wait for glowing coals before you put any food on.
Can I use a chiminea in cold or rainy weather?
Cold weather is actually ideal — the radiant heat feels great when temperatures drop. Avoid cooking in active rain, especially with a clay chiminea. Cold water hitting hot clay risks cracking. Cast iron and steel handle wet conditions better, but all chimineas should be covered between uses to extend their lifespan.
How do I clean my chiminea after cooking in it?
Wait until the chiminea is completely cold — at least 12 hours after the last fire. Scoop out ash with a small metal scoop and deposit it in a metal bucket. Scrub grates with a stiff wire brush and coat them lightly with oil while still slightly warm. For clay models, inspect for hairline cracks after each use. For a full maintenance routine, our chiminea care and maintenance guide covers everything season by season.
Final Thoughts
Cooking with a chiminea changes how you use your backyard — once it becomes a regular habit, firing up the gas grill for a standard weeknight dinner starts to feel like a missed opportunity. Pick the right material for how you actually cook, grab a properly sized grate and a pair of long-handled tongs, and start with something forgiving like foil-packet vegetables or sausages over coals. Your fire management will sharpen quickly, and within a few sessions you'll be planning your next cookout around the chiminea instead of anything else in your yard.


About William Murphy
William Murphy has worked as a licensed general contractor in Fremont, California for over thirty years, specializing in outdoor structures, green building methods, and sustainable design. During that career he has written about architecture, construction practices, and environmental protection for regional publications and trade outlets, bringing technical depth to subjects that most home improvement writers approach only from a consumer perspective. At TheBackyardGnome, he covers outdoor product reviews, backyard construction guides, and sustainable landscaping and building practices.
You can Get FREE Gifts. Receive Free Backyard Items here. Disable Ad Blocker to get them all now!
Once done, hit anything below