The right tiki hut building materials make or break your backyard build. Choose well and your tiki hut stands for decades. Choose poorly and you'll be patching rot and replacing thatch panels before the novelty wears off. This guide walks you through every material category — frames, roofing, thatching, and hardware — so you make smart decisions before you spend a dollar. Explore more resources in our complete tiki huts guide collection.
Traditional tiki huts drew from whatever grew nearby — bamboo, palm fronds, and native grasses. Today you have far more choices. You can stay traditional for that authentic island look, go fully synthetic for low-maintenance durability, or mix both approaches. The frame typically calls for treated lumber or dried bamboo poles, while the roof is where you decide between natural thatch, synthetic thatch, or reed panels. Each choice carries real trade-offs in cost, appearance, and lifespan.
Before you buy your first board or panel, you need to understand what each material does well and where it fails. This guide covers the full picture — from comparing material types side by side to sourcing, cutting, and maintaining your hut for the long haul.
Contents
Tiki Hut Building Materials at a Glance
Every tiki hut has two main components: the structural frame and the roof. Your choices in both categories determine how your finished structure looks, how long it lasts, and how much ongoing work it demands.
Frame Materials: Wood vs. Bamboo
Your frame carries the entire load. It needs to be strong, weather-resistant, and capable of supporting the roof even after heavy rain adds weight to the thatching. Here are the most common options:
- Pressure-treated pine — The most common choice for backyard builders. Treated lumber resists rot, insects, and moisture. It's affordable and available at any home improvement store.
- Cedar — Naturally resistant to rot and insects without chemical treatment. More expensive than pine, but beautiful and fragrant. A solid option if you want to avoid treated lumber near gathering areas.
- Bamboo poles — Lightweight, renewable, and authentic-looking. Bamboo is surprisingly strong but must be properly dried and sealed before use. Raw, untreated bamboo absorbs moisture rapidly and cracks within a season outdoors.
- Galvanized steel hardware — Used for post bases, brackets, and connection points. Keeps wood off the ground and prevents moisture from wicking into end grain where rot starts.
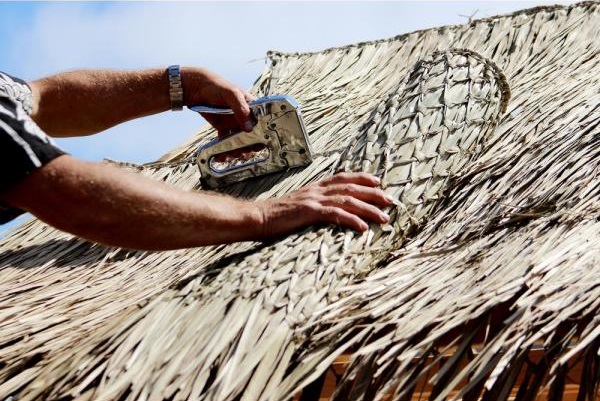
Roofing and Thatching Options
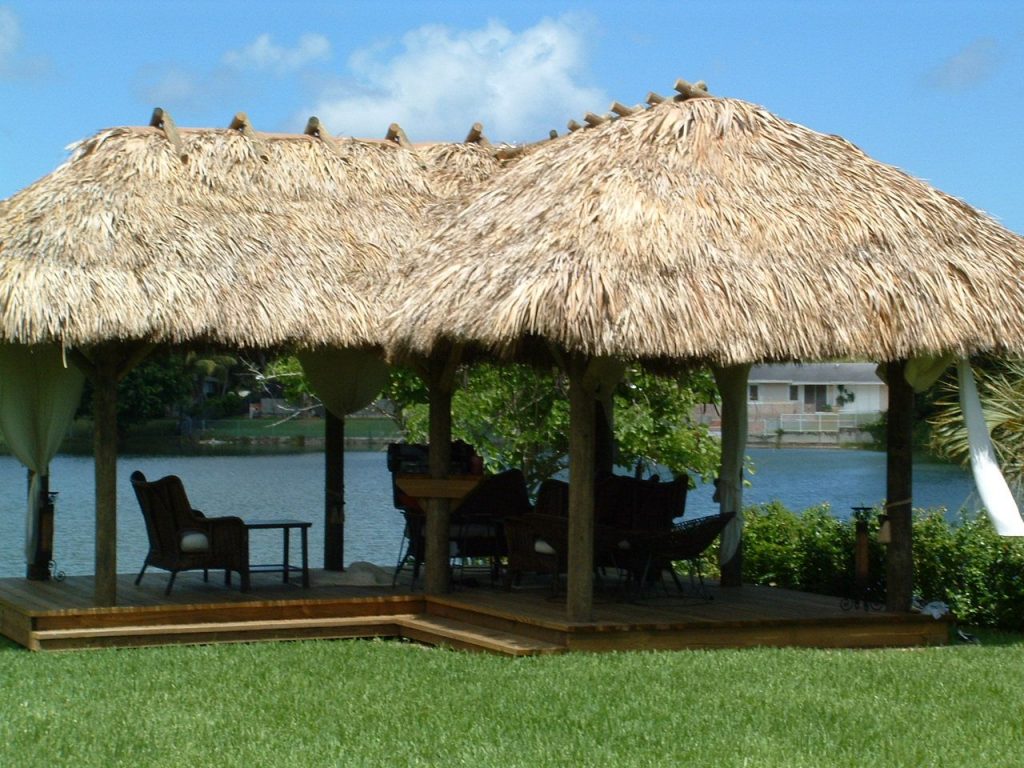
The roof is the most distinctive part of any tiki hut — and the part that takes the most abuse from sun, rain, and wind. You have four main thatching choices, each with genuine trade-offs in cost, appearance, and lifespan.
| Material | Lifespan | Approx. Cost (per sq ft) | Maintenance Level | Best Climate |
|---|---|---|---|---|
| Mexican Palm Thatch | 2–5 years | $2–$4 | High | Hot and dry |
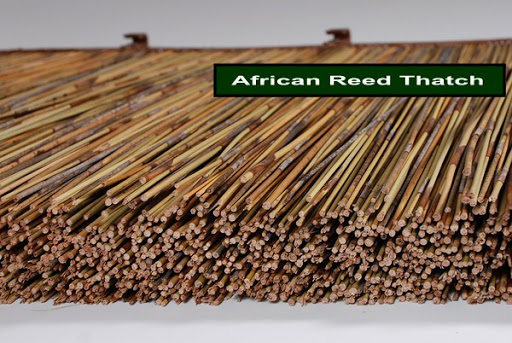
| Tahiti (Straw) Thatch | 3–7 years | $3–$5 | Medium-High | Coastal, mild |
| Reed Panels | 5–10 years | $4–$7 | Medium | Most climates |
| Synthetic Thatch | 15–25 years | $8–$15 | Low | Humid, high-traffic |
For most backyard setups, reed panels or synthetic thatch deliver the best balance of appearance and durability. Mexican palm thatch looks incredible but demands annual replacement in most climates outside the desert Southwest.
Choosing Materials That Stand the Test of Time
Your long-term satisfaction with your tiki hut depends almost entirely on picking materials suited to your specific environment. A hut that thrives in Phoenix will fail fast in Miami if you use the same materials. Think durability before aesthetics — you can always add decorative touches later.
Natural vs. Synthetic: Durability Breakdown
Natural materials look incredible. They also degrade faster. Here's the honest comparison so you can weigh the trade-offs yourself:
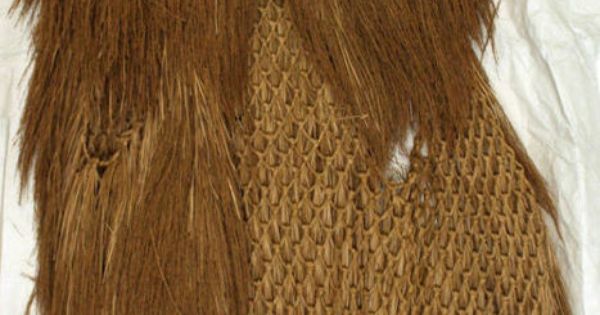
- Natural thatch needs replacement every 2–5 years depending on rainfall, sun intensity, and humidity. Left untreated, it can harbor insects and develop mold pockets that spread through the roof deck.
- Synthetic thatch is UV-stabilized polyethylene (a weatherproof plastic material) engineered to mimic real thatch. Most synthetic panels carry a 15-year warranty and need almost no upkeep beyond an occasional rinse.
- Bamboo poles used structurally should be kiln-dried and resealed with waterproof sealant every one to two years. Skip this step and they crack, split, and lose structural integrity quickly.
- Pressure-treated lumber is the most durable structural option. Look for the UC4B ground-contact rating for any posts set in soil or concrete — lower ratings are not built for that application.
If you want a low-maintenance build, go synthetic for the roof and treated lumber for the frame. You can also read more about protecting your structure from pests in our guide to tiki hut pest control — it's one of the most overlooked aspects of any outdoor build and directly tied to the materials you choose.
Pro tip: Apply a penetrating wood sealant to bamboo and cedar before assembly — coating all surfaces after the structure is built is nearly impossible and leaves gaps where moisture enters.
How Your Climate Changes Everything
Match your material selection to your local weather patterns. Here's a simple framework to guide your decision:
- Hot and dry climates (Southwest, Southern California) — Natural thatch holds up better here. Low humidity slows decomposition significantly. You can get 4–5 years from quality Mexican palm thatch in these conditions.
- Humid or tropical climates (Florida, Gulf Coast) — Skip natural thatch unless you're prepared to replace it every one to two years. Synthetic thatch and pressure-treated lumber are your best friends in high-humidity zones.
- Cold climates (Northeast, Midwest) — If your hut stays up year-round, you need materials rated for freeze-thaw cycles. Galvanized steel hardware is non-negotiable. Consider a removable or reinforced synthetic roof panel system that you can store over the coldest months.
The Tools and Hardware You'll Need
You don't need a professional toolkit to build a solid tiki hut. But you do need the right basics. Using the wrong tools — cutting bamboo with a standard wood saw or driving screws without a drill — slows you down and hurts the quality of the finished build.
Basic Hand Tools for the Frame
- Tape measure (25-foot minimum for spanning the full footprint)
- Carpenter's square for checking right angles at all frame connections
- Handsaw or reciprocating saw for cutting poles and lumber to length
- Rubber mallet for seating bamboo joints and driving post hardware
- 4-foot level plus a torpedo level for checking vertical posts during installation
- Sharp utility knife for trimming thatch panels and cutting rope cleanly
Fasteners, Hardware, and Accessories
The hardware you choose matters as much as the building materials themselves. Use stainless steel or hot-dipped galvanized fasteners throughout your entire build. Standard zinc-plated screws rust out in two to three outdoor seasons — a small cost difference upfront with a massive payoff in longevity.

Warning: Never use standard drywall screws or untreated deck screws outdoors — they'll rust and weaken critical structural connections within the first year, especially in humid climates.
You'll also want natural sisal rope or synthetic jute twine for lashing bamboo connections. This is functional and gives your build an authentic, handcrafted look. Stainless steel tiki torch accessories and fire pit accents help anchor the outdoor living space around the finished structure.

How to Source, Measure, and Prepare Your Materials
Knowing what you need is step one. Getting the right quantities — and prepping materials correctly before assembly — is where most first-time builders run into costly trouble. Follow these steps to avoid the most common ordering mistakes.
Planning Your Material Order
- Sketch your hut dimensions first. Include footprint size, roof pitch, and peak height. You need these numbers to calculate material quantities accurately — guessing leads to expensive shortfalls mid-build.
- Calculate your roofing square footage and add 15% for waste. Thatch panels overlap by roughly 50%, which means you need approximately twice the roof area in panels to cover it properly.
- Count your structural posts and determine required lumber lengths. A standard 10×10 hut typically needs four corner posts (8–10 feet) plus ridge beam and purlin (horizontal roof support bar) material.
- Source bamboo locally when possible. Bamboo poles ship poorly and can warp in transit. Check local nurseries, bamboo suppliers, or landscape material yards before ordering online.
- Order hardware in bulk. You'll use more fasteners than you expect. Plan for at least twice your initial estimate on screws, brackets, and lashing rope.
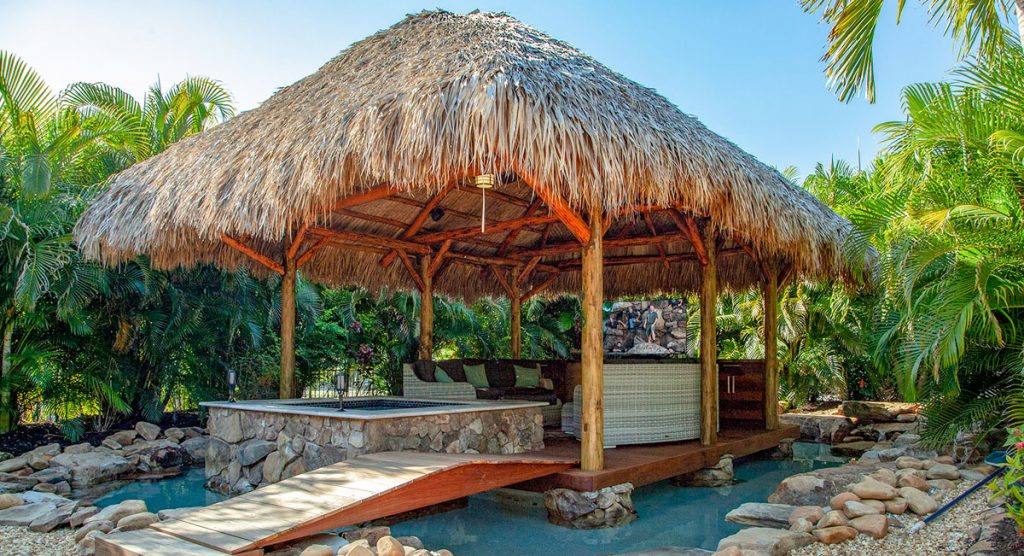
For a complete picture of what a finished outdoor tiki setup looks like before you lock in your material list, check out our guide to outdoor tiki huts and bars — it covers the full scope of what goes into these builds from layout to materials to accessories.

Cutting and Fitting the Roof Panels
Each roofing material installs differently. Here's how to handle each of the four main types without wasting material or creating leaks:
- Mexican palm capes (rain capes) — These fold over the purlins (horizontal roof support bars) and tie down with wire or natural rope. No cutting required — just size and layer them. Start from the bottom eave and work upward, overlapping each row by at least 8 inches.
- Reed panels — Cut with a sharp utility knife or aviation snips. Score and snap for straight cuts; don't try to cut through in a single pass. Install panels horizontally, nailed or stapled directly to the purlins.
- Tahiti thatch panels — These bundled grass panels nail directly to the purlins. Work from the bottom up, overlapping each row by at least 6 inches. Allow the bottom row to overhang the eave by 4–6 inches for proper water runoff.
- Synthetic thatch panels — The easiest type to install. Most include built-in mounting tabs or tie points. A standard utility knife handles all trimming. Stay consistent with your direction — either ridge-down or bottom-up — and your rows will align cleanly.

If you want to understand how natural plant-based materials behave over time in outdoor conditions, our breakdown of the difference between rattan and wicker gives useful context on how woven and fibrous materials age when exposed to the elements — directly relevant to your thatching decisions.
Best Practices for a Long-Lasting Tiki Hut
Even the best tiki hut building materials fail early when assembled or maintained incorrectly. These are the practices that separate huts that last from ones that fall apart before you get your money's worth out of them.
Mistakes to Avoid During the Build
- Setting posts directly in soil — Posts set in bare ground wick moisture and rot from the bottom up, no matter how good the lumber is. Always use galvanized post bases set in concrete footings.
- Under-thatching the roof — Insufficient overlap on thatch panels creates leak points right at the joints. More overlap is always better. Aim for at least 50% overlap on every row.
- Using untreated lumber for ground contact — Standard dimensional lumber fails within two to three years in soil. Always specify UC4B-rated pressure-treated lumber for any post application where the wood touches the ground or concrete.
- Ignoring fire safety requirements — Natural thatch is a fire hazard. Check your local building code and apply fire retardant treatment to any natural roofing material before installation. Many municipalities require this for permitted outdoor structures.
Ongoing Maintenance Schedule
Build a simple maintenance routine into your calendar from day one. Here's what to do and when to do it:
- Annually: Inspect all fasteners for surface rust. Replace corroded hardware before it compromises the connection. Re-seal bamboo or cedar that shows drying, fading, or hairline cracks.
- Every 2–3 years: Check natural thatch for thinning sections, mold spots, or signs of insect activity. Replace affected sections before the damage spreads to adjacent panels.
- After major storms: Inspect all connections and re-tie any loose lashing. Remove debris from the roof surface — pooled water accelerates thatch decomposition faster than almost anything else.
- Before winter (cold climates): Apply a fresh coat of sealant to all wood and bamboo surfaces. Consider removing natural thatch and storing it indoors to significantly extend its usable life.
Pro insight: The biggest mistake backyard builders make is waiting for visible damage before doing maintenance — by that point, you're replacing material instead of simply preserving it.
Frequently Asked Questions
What are the most common tiki hut building materials for the frame?
The most common frame materials are pressure-treated pine, cedar, and dried bamboo poles. Pressure-treated pine is the most widely used because it's affordable, rot-resistant, and easy to source at any home improvement store. Cedar is a natural alternative with built-in rot resistance. Bamboo works well structurally but must be kiln-dried and sealed before installation to prevent cracking.
How long does natural thatch last on a backyard tiki hut?
It depends heavily on your climate. In hot, dry regions, quality Mexican palm thatch can last 4–5 years. In humid or rainy climates, expect to replace natural thatch every 1–3 years. Synthetic thatch, by contrast, typically lasts 15–25 years with minimal maintenance — making it the better long-term investment for most homeowners.
Is bamboo a good structural material for a tiki hut?
Yes, when it's properly prepared. Bamboo is surprisingly strong — comparable to many hardwoods pound for pound. The key is using kiln-dried poles and applying a waterproof sealant before installation. Unsealed bamboo absorbs moisture, cracks, and loses structural integrity quickly in outdoor conditions, so preparation is everything.
What's the difference between Mexican palm thatch and synthetic thatch?
Mexican palm thatch is made from dried palm fronds — it delivers an authentic island look but degrades relatively quickly and requires periodic replacement depending on climate. Synthetic thatch is manufactured from UV-stabilized polyethylene designed to mimic natural thatch, but it lasts 15–25 years and requires virtually no maintenance beyond occasional cleaning with a garden hose.
Do I need a permit to build a backyard tiki hut?
It depends on your municipality and the size of the structure. Many jurisdictions require a permit for any permanent outdoor structure above a certain square footage or height. Check with your local building department before you start construction. Natural thatch roofing often triggers additional fire code requirements that must be addressed during the permitting process.
What type of fasteners should I use for outdoor tiki hut construction?
Always use stainless steel or hot-dipped galvanized fasteners throughout your build. Standard zinc-plated screws and nails rust quickly in outdoor conditions — especially in humid climates — and can weaken critical structural connections within just a few years. The price difference between standard and galvanized hardware is small compared to the cost of rebuilding failed connections.
How do I prevent insects from nesting in my tiki hut's natural thatch?
Apply a borax-based insect-repellent spray or a commercial thatch treatment before and after installation. Inspect the roof at least once per year for signs of wasp nests, beetle damage, or termite activity. Keeping the thatch dry and well-ventilated is the single most effective long-term prevention strategy — moisture is what attracts and sustains most pest populations.
Can I build a tiki hut myself, or should I hire a professional?
Most backyard tiki huts are fully DIY-friendly, especially smaller 10×10 or 12×12 structures. You need basic carpentry skills, the right tools, and quality materials. Larger structures — particularly those with concrete footings, electrical wiring, or complex roof framing — benefit from professional help on specific steps like post setting and framing layout. The thatching and finish work is almost always DIY territory regardless of scale.
Next Steps
- Sketch your hut's footprint and calculate your total roofing square footage — this single number drives every material quantity decision you'll make.
- Use the comparison table in this guide to choose your roofing material based on your climate and your honest maintenance tolerance.
- Confirm that any structural lumber you purchase carries a UC4B ground-contact rating before you place your order.
- Switch your fastener order to stainless steel or hot-dipped galvanized hardware and buy at least twice your estimated quantity of screws and lashing rope.
- Contact your local building department to confirm permit requirements, and apply fire retardant to any natural thatching material before installation day.


About Simmy Parker
Simmy Parker holds a Bachelor of Science in Civil Engineering from Sacramento State University and has applied that technical background to outdoor structure design, landscape planning, and backyard improvement projects for over a decade. Her love for the outdoors extends beyond design — she regularly leads nature hikes and has developed working knowledge of native plants, soil conditions, and sustainable landscaping practices across Northern California. At TheBackyardGnome, she covers backyard design guides, landscaping ideas, and eco-friendly outdoor living resources.
You can Get FREE Gifts. Receive Free Backyard Items here. Disable Ad Blocker to get them all now!
Once done, hit anything below