Last summer, a neighbor's gazebo canopy finally gave out after years of punishment from the sun and rain — faded, torn at two seams, and sagging so badly it collected water in the center like a bucket. She assumed the whole structure was finished. It wasn't. If your canopy looks rough, knowing how to replace gazebo canopy fabric or panels yourself is one of the most practical backyard repairs you can tackle. It's a weekend job, not a contractor call.
Gazebos fall into two canopy categories: soft-top fabric and hard-top panels. Both wear out. Both can be replaced without scrapping the entire structure. This guide covers the tools, the cost, the step-by-step process, and the pro tips that most guides skip — for both types. If your structure needs a solid foundation review first, check out how to set up a gazebo on grass, concrete, or pavers before you dive into canopy work. Everything canopy-related also lives in our gazebo maintenance guides section.
Your canopy is your gazebo's first line of defense against UV radiation, wind, and rain. When it fails, the frame takes the punishment next. Acting early is always the smarter move.
Contents
What You'll Need Before You Start
Before you pull out the old canopy, get everything staged. Stopping mid-job to run to the hardware store wastes time — and leaves your frame exposed if weather rolls in.
Soft-Top Canopy Tools
Fabric canopy swaps need very little gear:
- Ladder tall enough to reach all four sides comfortably
- Flat-head screwdriver or plastic trim removal tool
- Scissors or a utility knife
- Zip ties or bungee cords (to hold the new fabric in place while you work)
- Measuring tape
- A second pair of hands
You'll also need the replacement canopy itself. Always buy a canopy made for your exact gazebo model — universal fits almost never work. Check the model number on the frame tag or your original receipt before you order anything.
Hard-Top Panel Tools
Hard-top panels — typically polycarbonate (a tough, weather-resistant plastic) or corrugated metal — need a bit more hardware:
- Power drill with screwdriver bits
- Roofing screws with rubber washers (the washers create a watertight seal)
- Safety glasses and work gloves
- Ladder and a helper
- Silicone sealant for panel edges
- Circular saw with a fine-tooth blade (if cutting panels to fit)
Always work with a second person when handling hard-top panels. They're heavy, awkward to maneuver at height, and a dropped panel can damage the frame or cause a serious injury.
Signs It's Time to Replace — and When to Hold Off
Not every worn canopy needs full replacement. Knowing the difference saves you real money.
Clear Signs You Need a Replacement
Replace your canopy when you see any of the following:
- Persistent water pooling — the fabric has stretched past its drainage point and won't recover
- Tears or holes larger than an inch, especially near stress points like grommets (the metal rings at attachment points)
- Fading so severe the material has turned brittle or stiff
- Mold or mildew that won't clear after bleach treatment
- Bent, cracked, or missing grommets preventing proper attachment
- Hard panels that are cracked, warped, or have missing sections
Any one of these signals a canopy past its useful life. Patching a structurally compromised canopy delays the inevitable — and a canopy failure during a storm can take the frame down with it.
When a Repair Makes More Sense
Hold off on replacing if the damage is isolated and minor. A small tear? Outdoor canopy repair tape handles it cleanly. A loose grommet? A grommet replacement kit from any hardware store fixes it in ten minutes. Surface staining with no material breakdown? A good wash with mild soap usually restores the look.
If your canopy is under two years old and one problem area is the only issue, repair is the smarter call. If it's past five years and showing multiple failure points, a full replacement saves more money in the long run than repeated patching.
Keep a count of your repairs. Three or more patches in a single season is your cue to budget for a full replacement before the next one.

What a Gazebo Canopy Replacement Actually Costs
Cost varies significantly based on canopy type, structure size, and whether you do it yourself or hire out the labor. Here's an honest breakdown so you can plan ahead.
Soft-Top Fabric Costs
Soft-top fabric canopies are consistently cheaper. A replacement fabric for a standard 10×10 or 10×12 gazebo runs between $30 and $150 depending on material quality. UV-resistant polyester with a waterproof coating sits at the higher end — and it's worth every extra dollar. Cheap fabric fails within a single season of direct sun exposure.
Hard-Top Panel Costs
Hard-top replacements cost more upfront but last significantly longer. Polycarbonate panels for a 10×10 frame run $100–$400 for materials alone. Corrugated metal panels fall in a similar range. If your original panels are proprietary (manufactured specifically for your brand), expect to pay a premium for manufacturer-sourced replacements.
| Canopy Type | DIY Material Cost | Labor (If Hired) | Total Range |
|---|---|---|---|
| Soft-Top Fabric (10×10) | $30–$150 | $50–$100 | $30–$250 |
| Soft-Top Fabric (12×14) | $80–$200 | $75–$150 | $80–$350 |
| Hard-Top Polycarbonate (10×10) | $100–$400 | $150–$300 | $100–$700 |
| Hard-Top Corrugated Metal (10×10) | $120–$450 | $150–$300 | $120–$750 |
| Full Professional Replacement | N/A | $300–$800+ | $300–$800+ |
DIY saves you 40–60% in most cases. Soft-top swaps take two to three hours. Hard-top jobs run a half day. Neither requires specialized skills — just patience and a helper.
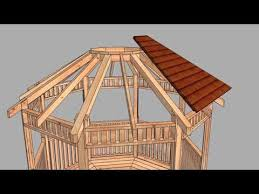
How to Replace a Gazebo Canopy Step by Step
The process for how to replace gazebo canopy fabric differs from hard-top panel replacement at almost every step. Follow the right process for your type from the start.
Replacing a Soft-Top Fabric Canopy
- Remove the old canopy — Start at one corner and work around the frame, unclipping hooks, sliding fabric out of channels, or releasing bungee loops. Most soft-tops use hook-and-loop (Velcro), snap clips, or bungee loops at the grommets.
- Clean the frame rails — Wipe down with a damp cloth. Check for rust spots, cracked welds, or bent connectors while you're up there. Address these before the new canopy goes on.
- Lay the new canopy out flat — Identify the front edge. Most canopies have a valance (the decorative hanging skirt) on the front-facing side — that's your orientation marker.
- Attach at the center of each side first — Hook or clip the midpoint of each rail before working outward to the corners. This prevents lopsided tension and fabric bunching.
- Check tension on all sides — Pull the fabric taut but don't overtighten. Proper tension sheds water naturally. Over-tightening stresses the grommets and causes premature tearing.
Replacing Hard-Top Panels
- Remove existing panels starting from the center — Work outward to the edges. Stack removed panels flat on the ground to prevent warping or cracking.
- Inspect the purlins (the horizontal support bars) — Replace any that are bent, cracked, or heavily corroded before laying new panels. A bad purlin will compromise your new panels quickly.
- Cut new panels to size if needed — Use a circular saw with a fine-tooth blade for polycarbonate. Score-and-snap works for corrugated metal. Always wear eye protection when cutting.
- Overlap panels by at least one full ridge — This is the step most first-timers skip. Proper overlap is what prevents leaks at panel seams.
- Pre-drill holes slightly larger than the screw shaft — Polycarbonate expands and contracts with temperature changes. Tight holes cause cracking within a couple of seasons. Apply a dab of silicone into each hole before driving the roofing screw.
- Seal all perimeter edges — Run a bead of silicone sealant wherever panels meet the frame. Let it cure fully before the first rain.
Pre-drilling oversized holes in polycarbonate panels isn't optional — it's the difference between panels that last a decade and panels that crack within two seasons.
Pro Tips for Making Your New Canopy Last
Replacing the canopy is the straightforward part. Getting maximum life out of the new one takes a bit more attention.
Extending Canopy Life Season to Season
- Apply a UV protectant spray to fabric canopies at the start of each season. It slows color fade and material breakdown significantly — most products add one to two extra years of life with consistent use.
- Clean your canopy at least twice per season with mild soap and water. Dirt, pollen, and debris trap moisture against the fabric and accelerate decay from the inside out.
- Take the canopy down or retract it ahead of any storm with sustained winds over 30 mph. Most soft-top canopies aren't rated for high-wind conditions, and a blown canopy can damage the frame underneath.
- For hard-tops, inspect the silicone sealant around screws and seams every spring. It degrades over time, and a five-minute touch-up prevents water intrusion that ruins both the panels and the frame below.
- Store fabric canopies indoors during winter in cold climates. Freeze-thaw cycles degrade stitching and grommets faster than UV exposure ever will.
Your gazebo's surface matters too. An unlevel base causes water to pool in one corner of the canopy — the fastest route to premature fabric failure. If your structure isn't sitting level, fix that before installing a new canopy. And if you plan to button up your outdoor space at the end of the season, our guide on how to winterize your pergola covers cold-weather prep that applies directly to gazebo care as well. More seasonal maintenance resources are also in our gazebo maintenance guides.
Frequently Asked Questions
How do I find the right replacement canopy for my gazebo?
Check the model number on a sticker or tag attached to your frame — usually on one of the main posts or a cross-beam near the base. If the tag is gone, measure the frame from post to post (not the existing fabric) and contact the manufacturer directly with that measurement and your approximate purchase year. Model-specific canopies always fit better than universal options.
Can I use a universal canopy on any gazebo frame?
Universal canopies rarely fit correctly. Gazebo frames use proprietary attachment systems — channel widths, grommet spacing, and valance placement all differ by brand and model. A poorly fitted canopy sags, pools water, and fails early. Buy a model-specific replacement whenever it's available.
How long does a replacement gazebo canopy last?
A quality soft-top canopy with a UV-resistant coating lasts three to five years with proper seasonal care. Budget canopies in direct sun environments last one to two seasons before degrading. Hard-top polycarbonate panels installed with proper sealant and thermal-expansion room last ten to fifteen years under normal conditions.
Is it worth replacing just the canopy instead of buying a whole new gazebo?
If your frame is structurally sound — no bent posts, no broken connectors, no significant rust on load-bearing joints — replacing the canopy is almost always the right financial call. A new gazebo runs $200 to $2,000 or more. A replacement canopy costs $30 to $450. The math is straightforward.
Do I need special tools to replace a gazebo canopy?
For soft-top fabric, basic hand tools and a ladder are all you need. For hard-top panels, you'll need a power drill, roofing screws with rubber washers, silicone sealant, and protective gear. Neither job requires professional training, but a second person makes both significantly safer and faster — especially for hard-tops.
Can I upgrade from a soft-top to a hard-top canopy on the same frame?
It depends on your frame's load capacity. Hard panels add significant weight, and frames designed for fabric aren't always engineered to handle it — especially under snow load or sustained wind. Check your gazebo's weight specifications before purchasing hard-top materials. When in doubt, contact the manufacturer directly.
A gazebo frame can outlast a dozen canopies — all it takes is knowing when to replace, what to buy, and how to install it right.


About Simmy Parker
Simmy Parker holds a Bachelor of Science in Civil Engineering from Sacramento State University and has applied that technical background to outdoor structure design, landscape planning, and backyard improvement projects for over a decade. Her love for the outdoors extends beyond design — she regularly leads nature hikes and has developed working knowledge of native plants, soil conditions, and sustainable landscaping practices across Northern California. At TheBackyardGnome, she covers backyard design guides, landscaping ideas, and eco-friendly outdoor living resources.
You can Get FREE Gifts. Receive Free Backyard Items here. Disable Ad Blocker to get them all now!
Once done, hit anything below