Have you ever watched a clay chiminea split clean down the side after just three or four fires? That's what happens when the curing step gets skipped — and it's completely avoidable. Understanding how to care for clay chiminea starts before you light the very first fire. Get the process right from day one, and your chiminea will reward you with years of warm evenings and crackling fires. Get it wrong, and you're looking at cracks, staining, or structural failure before the season even ends. This guide, part of our clay chiminea care resource, covers everything: curing, seasonal maintenance, honest comparisons, and how to fix problems when they show up.
Clay chimineas have been warming outdoor spaces since their origins in ancient Mesoamerica. They're beautiful, functional, and far more affordable than cast iron alternatives — but that affordability comes with a condition. Clay is porous and reactive. It expands when heated and contracts when cooled. Every fire you build inside one puts physical stress on the material. That's not a design flaw; it's just physics. And once you understand it, the care routine makes perfect sense.
The good news is that a well-maintained clay chiminea is surprisingly resilient. A few basic habits — applied consistently — are all that stands between a crumbling pot and a backyard centerpiece that holds up season after season. Whether you're firing one up for the first time or troubleshooting a chiminea that's already seen better days, this guide has you covered.
Contents
- What Happens When You Skip Clay Chiminea Maintenance
- How to Cure Your Clay Chiminea Before the First Fire
- Clay vs. Cast Iron: The Honest Trade-Offs
- How to Care for Clay Chiminea Throughout the Year
- Getting More From Your Chiminea in Every Season
- Cracked, Stained, or Smoky: Fixing Common Clay Chiminea Problems
- Frequently Asked Questions
- Key Takeaways
What Happens When You Skip Clay Chiminea Maintenance
Most clay chiminea owners discover the importance of maintenance the hard way — after the damage is already done. A chiminea that hasn't been properly cured is structurally vulnerable. The first time you build a large fire inside an uncured pot, the sudden thermal shock forces the clay to expand unevenly. That's how you get hairline cracks that deepen with every subsequent fire.
The Crack Problem Explained
Clay is a naturally porous material. Small surface cracks are cosmetically annoying but structurally harmless — they're normal and expected over time. Deep structural cracks that penetrate the bowl wall are a different matter entirely. These compromise the integrity of the chiminea and can cause pieces to break away during a fire, which is a genuine safety hazard. The root cause is almost always thermal shock from fires that were too large, too early, or built in a pot that was never seasoned.
Moisture Is the Silent Killer
Water trapped inside the clay body is just as dangerous as fire mismanagement. When moisture heats up rapidly, it converts to steam, and steam needs somewhere to go. In an uncured or unsealed chiminea, that pressure blows out from inside the clay wall. Left uncovered during rain or overnight dew, even a well-cured chiminea will absorb enough moisture over time to cause problems. This is exactly why covering your chiminea between uses isn't optional — it's the single most impactful maintenance habit you can build.
How to Cure Your Clay Chiminea Before the First Fire
Curing — also called seasoning — is the process of gradually hardening the clay by exposing it to progressively hotter fires. Think of it like breaking in a new cast iron skillet: you're conditioning the material so it performs reliably under stress. This step is non-negotiable. Our detailed chiminea care and maintenance guide covers the full rationale, but here's the practical process.
The Curing Process, Step by Step
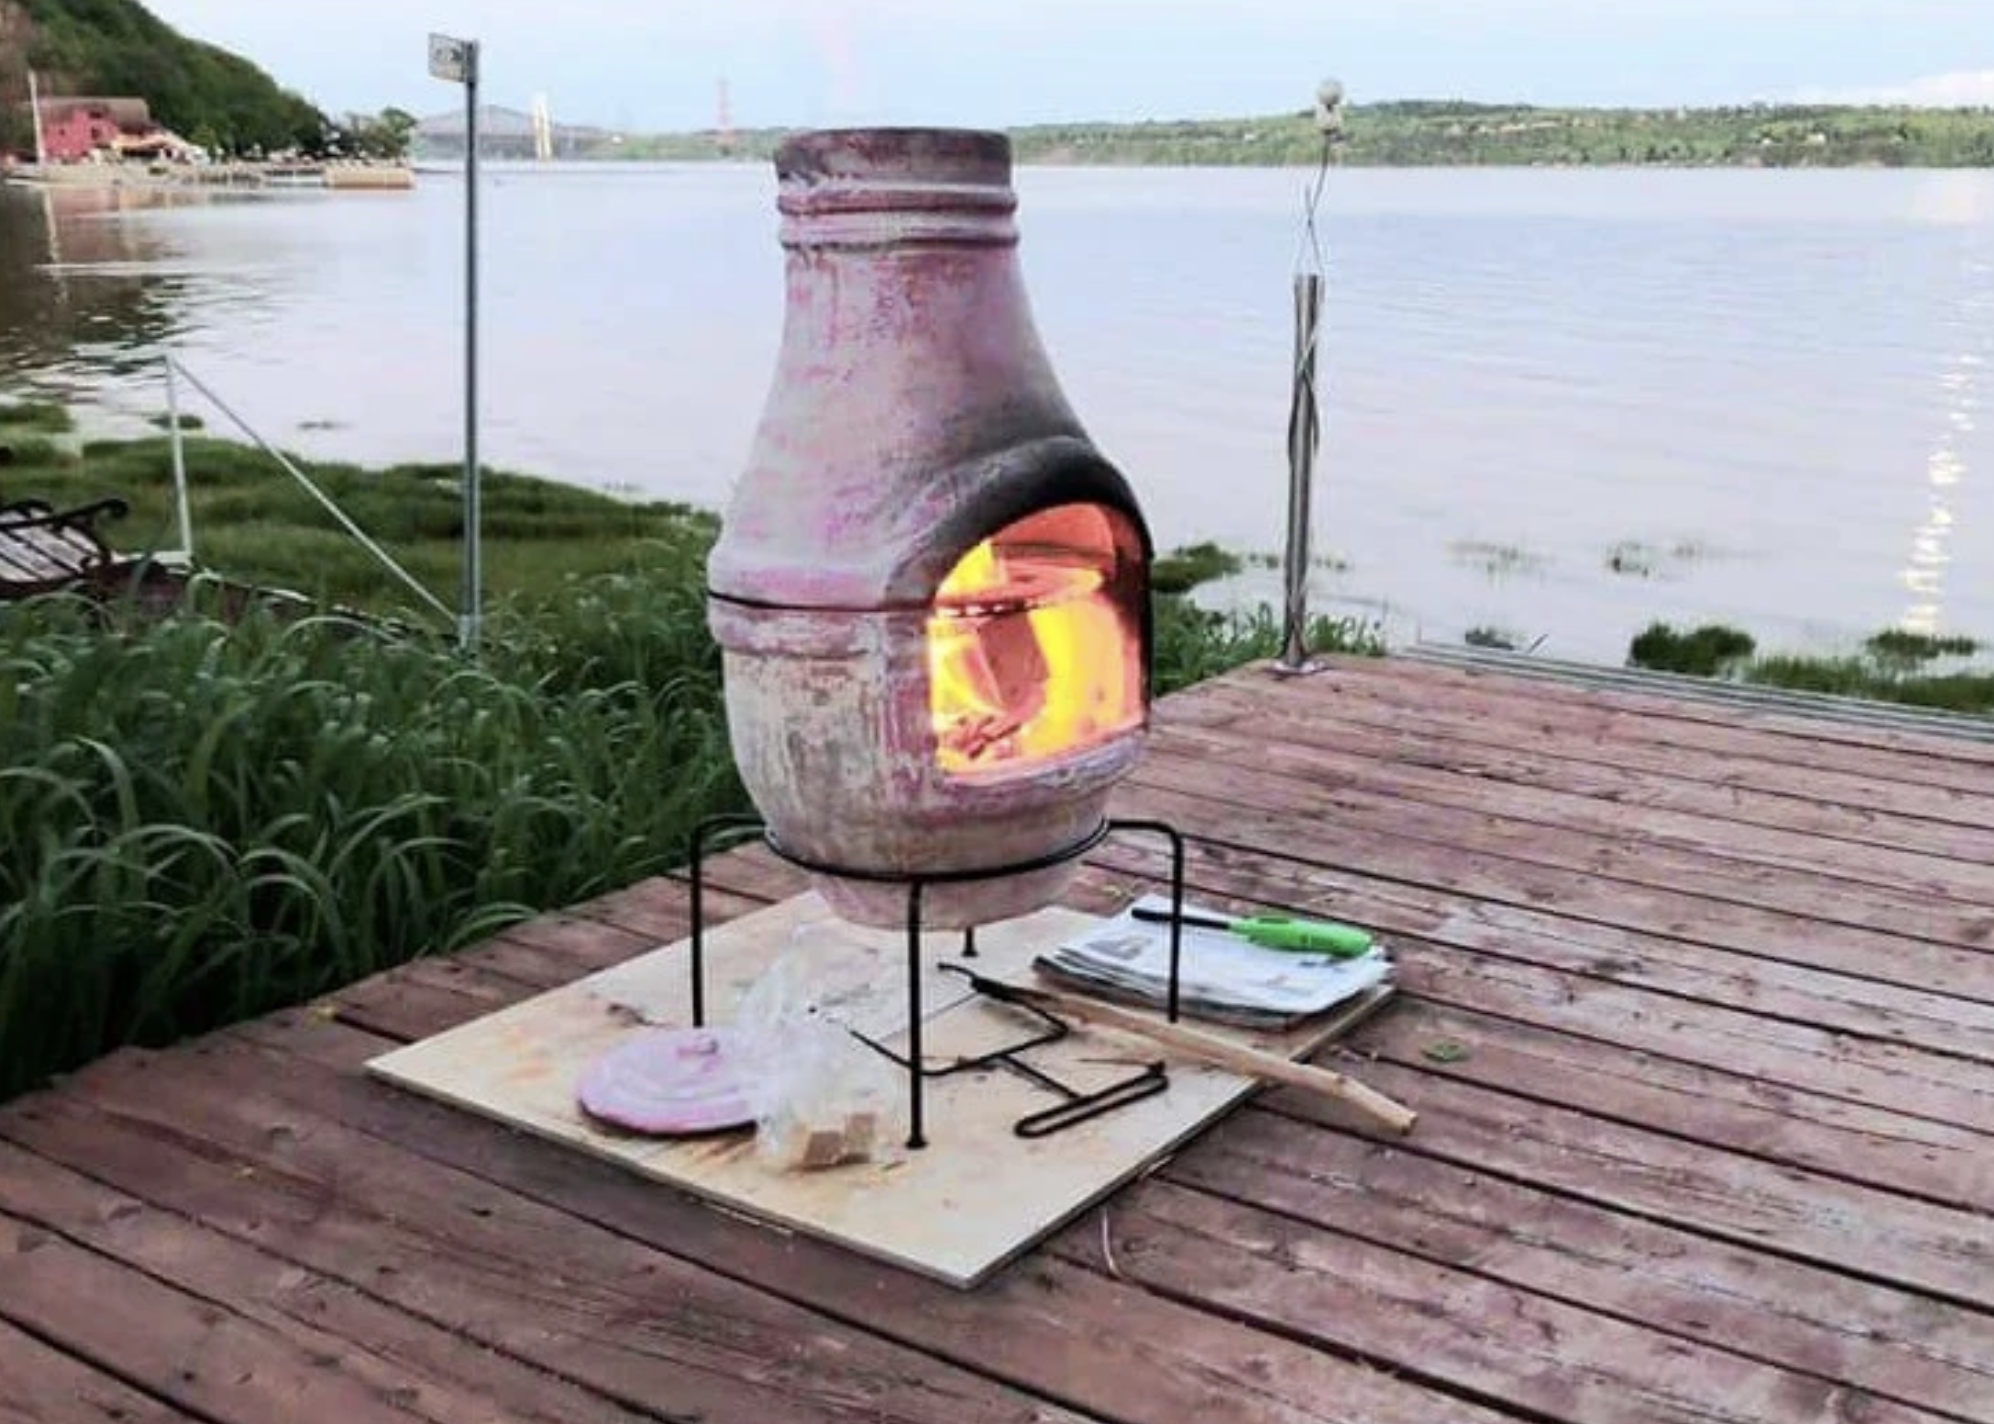
Start by placing two to three inches of sand in the base of the bowl. Sand acts as a heat buffer and protects the bottom of the clay from direct contact with burning embers. For your first fire, use only a small amount of newspaper and a handful of kindling. Let it burn down completely, then allow the chiminea to cool fully before building the next fire. Repeat this three to four times, gradually increasing the size of each fire. By the fourth or fifth session, you can build a full-sized fire without concern.
Pro tip: Never rush the curing process by stacking multiple fires in the same day — each fire needs to fully cool before the next to avoid uneven thermal stress in the clay walls.
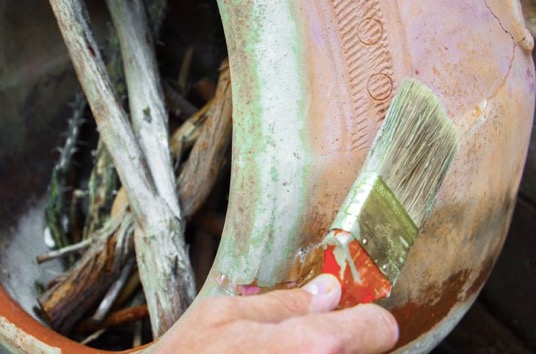
Applying a Sealant After Curing
Once the chiminea is fully cured and completely cool, apply a terracotta sealant or linseed oil to the exterior surface. This reduces moisture absorption dramatically. Work it into the surface with a cloth, let it absorb, then wipe off the excess. Reapply the sealant once per season or immediately after any period of heavy rain exposure. This one habit extends the life of a clay chiminea by years.
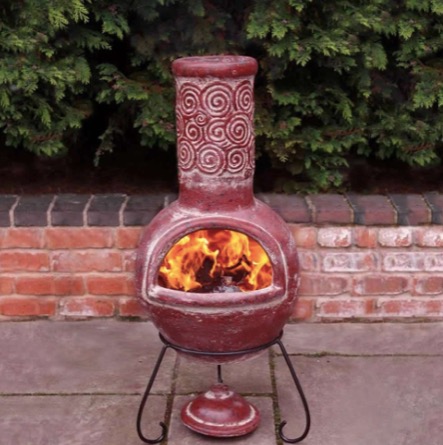
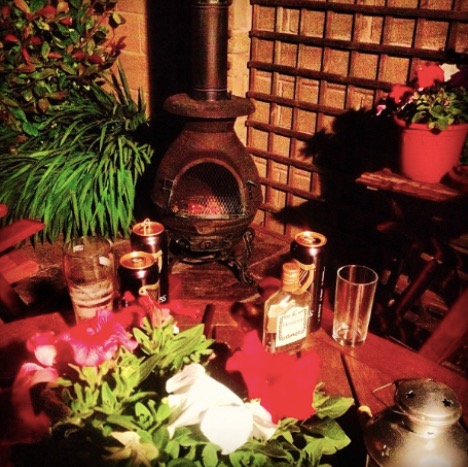
Clay vs. Cast Iron: The Honest Trade-Offs
Clay chimineas are not the right choice for every backyard. Before committing to long-term clay chiminea care, it helps to understand where clay genuinely outperforms cast iron — and where it doesn't. If you're also considering metal options, the Blue Rooster Cast Iron Casita Chiminea review gives an honest picture of what that alternative looks like in practice.
Quick Comparison at a Glance
| Feature | Clay Chiminea | Cast Iron Chiminea |
|---|---|---|
| Weight | Lighter, easier to reposition | Very heavy, difficult to move |
| Heat output | Moderate, diffused warmth | High, radiates intense heat |
| Durability | Fragile; requires careful handling | Highly durable; rust-resistant when painted |
| Maintenance effort | Regular sealing and covering needed | Periodic repainting; less intensive |
| Aesthetic appeal | Traditional, rustic, artisan look | Industrial or decorative finish options |
| Price point | Lower upfront cost | Higher upfront cost |
| Crack resistance | Prone to cracking if mismanaged | Crack-resistant under normal use |
Clay wins on aesthetics and price. Cast iron wins on durability and low-maintenance use. If you're willing to invest the time in proper care, clay delivers a warmth and character that metal simply can't match.
How to Care for Clay Chiminea Throughout the Year
Knowing how to care for clay chiminea isn't a one-time checklist — it's a rhythm that changes with the seasons. The good news is that once these habits are established, they take almost no time at all.
Fire Management and Fuel Choices
Always burn dry, seasoned hardwood. Wet or green wood produces excessive smoke, burns inefficiently, and leaves heavy creosote deposits inside the chimney neck. Keep fires moderate in size — the bowl should never be packed more than two-thirds full. Burning garbage, treated wood, or charcoal in a clay chiminea is a fast path to structural damage and toxic fume exposure. Stick to natural firewood, and your fire will draw cleanly through the neck every time.

Covering and Storage
A weatherproof cover is the single best investment you can make for your chiminea outside of the initial purchase. Cover it every single time it's not in use, even overnight in dry weather. During winter months, move the chiminea into a covered area — a garage, shed, or covered patio works perfectly. If outdoor storage is your only option, place it on a raised platform so the base doesn't absorb ground moisture, and use a heavy-duty cover with a snug fit. Never store a chiminea with ash still inside; ash holds moisture and accelerates interior deterioration.
Warning: Never use a chiminea on a wooden deck without placing it on a fire-resistant pad — a single rolling ember can cause serious damage to deck boards.
Getting More From Your Chiminea in Every Season
A clay chiminea is more versatile than most people realize. The obvious use is warmth on cool evenings — and for that, few backyard features compete. Paired with a set of comfortable chairs and the right outdoor setup, a chiminea becomes the heart of your outdoor living space. For inspiration on building that environment, the best outdoor fireplaces guide and our roundup of sunken fire pit ideas are worth a look for broader context on outdoor fire features.
More Than Just Warmth
Beyond warmth, clay chimineas work beautifully as ambient mood lighting for outdoor entertaining. Their narrow necks naturally direct smoke upward, keeping your seating area relatively smoke-free compared to open fire pits. In the warmer months, a small fire in the evening keeps mosquitoes and insects at bay without chemical repellents. Some models are wide enough to support small cast iron cookware for grilling or heating food — just confirm your specific model is rated for cooking use before attempting it.
For a complete outdoor fire experience, compare what a chiminea offers against dedicated fire pit setups. The best fire pit guide breaks down alternatives that might complement your chiminea — or replace it, depending on your priorities.
Cracked, Stained, or Smoky: Fixing Common Clay Chiminea Problems
Even well-maintained chimineas develop issues over time. Knowing how to diagnose and address them quickly prevents small problems from becoming expensive ones.
Repairing Surface Cracks
Hairline surface cracks are cosmetic and common — don't panic when you see them. Clean the crack thoroughly with a stiff brush to remove loose debris, then fill it with a fire-rated refractory cement or a clay-based repair compound. Press the filler firmly into the crack, smooth the surface flush, and allow it to cure fully before the next fire. Do not attempt to repair cracks while the chiminea is still warm — the temperature differential will prevent the repair compound from bonding properly.
Dealing With Excessive Smoke
Excessive smoke almost always comes down to fuel quality or airflow restriction. Wet firewood is the most common culprit — always check that your wood has been properly seasoned before burning. A blocked chimney neck from accumulated soot or debris is the second most frequent cause. Use a stiff-bristled brush to clear deposits from inside the neck after every few uses. If smoke still backs out into the seating area, check that the chiminea mouth is oriented away from prevailing wind. A slight repositioning often solves the problem immediately.
Frequently Asked Questions
How often should I seal my clay chiminea?
Apply a terracotta sealant or linseed oil at least once per season — typically at the start of spring before regular use begins. Reapply immediately if the chiminea has been exposed to heavy rain or has gone several months without treatment. A properly sealed exterior repels moisture and significantly extends the lifespan of the clay.
Can I leave my clay chiminea outside in winter?
You can, but it requires preparation. Move it onto a raised platform to prevent ground moisture absorption, fill the interior bowl with dry sand or cover the opening completely, and use a heavy-duty weatherproof cover. If temperatures regularly drop below freezing in your area, indoor storage is the safer option — freeze-thaw cycles are particularly hard on unprotected clay.
What is the best wood to burn in a clay chiminea?
Dry, seasoned hardwoods like oak, hickory, or ash are the best choices. They burn hot, produce minimal smoke, and leave less residue inside the chimney neck. Avoid softwoods like pine, which burn with heavy soot, and never burn treated, painted, or laminated wood — the chemical fumes are harmful and the irregular burn damages the clay over time.
How do I clean the inside of my clay chiminea?
Allow the chiminea to cool completely, then scoop out accumulated ash and debris with a small trowel. Use a stiff-bristled brush to clear the interior walls and chimney neck. Avoid water inside the bowl — it saturates the clay and promotes cracking. A thin layer of ash left on the base actually provides useful insulation for future fires, so complete removal isn't necessary every time.
Is it safe to use a clay chiminea on a wood deck?
Only with proper precautions. Place the chiminea on a fire-resistant pad or metal stand designed for the purpose, and maintain adequate clearance from deck railings, furniture, and overhead structures. Never position it directly on bare wood. Keep a bucket of water or a fire extinguisher nearby as a standard safety measure. Check your local fire regulations, as some areas restrict open fires on decks.
Key Takeaways
- Curing your clay chiminea with progressively larger fires before full use is the single most important step to preventing structural cracks.
- Applying a terracotta sealant seasonally and covering the chiminea after every use protects the clay from moisture damage year-round.
- Always burn dry, seasoned hardwood — wet wood and treated materials cause smoke problems and accelerate interior deterioration.
- Surface cracks are repairable with fire-rated refractory cement, but deep structural cracks are a safety hazard that requires immediate attention or replacement.


About Simmy Parker
Simmy Parker holds a Bachelor of Science in Civil Engineering from Sacramento State University and has applied that technical background to outdoor structure design, landscape planning, and backyard improvement projects for over a decade. Her love for the outdoors extends beyond design — she regularly leads nature hikes and has developed working knowledge of native plants, soil conditions, and sustainable landscaping practices across Northern California. At TheBackyardGnome, she covers backyard design guides, landscaping ideas, and eco-friendly outdoor living resources.
You can Get FREE Gifts. Receive Free Backyard Items here. Disable Ad Blocker to get them all now!
Once done, hit anything below