Over 68 percent of consumers who upgrade from an open fire pit to a dedicated chiminea report measurably warmer, longer outdoor sessions — and the iron embers chiminea fire pit is one of the most consistently cited reasons for that improvement. If you've been researching the outdoor fireplace market and Iron Embers keeps rising to the top of your shortlist, that's not coincidence: it reflects a track record of engineering quality that holds up across multiple seasons of real-world use. This guide covers first-time setup, debunked myths, performance upgrades, and a frank assessment of where this unit excels and where it doesn't.
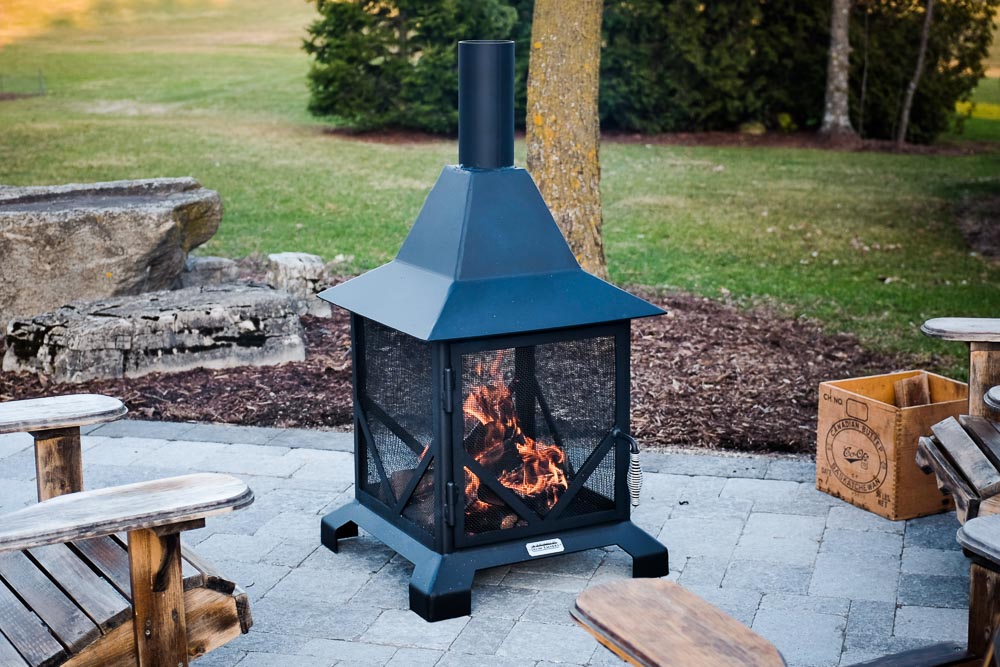
Iron Embers is a Canadian-designed brand that builds its chimineas from heavy-gauge cast iron — a material that absorbs heat slowly and radiates it evenly long after the flames die down. Before zeroing in on a specific model, the Iron Embers brand overview lays out the full lineup across price points and configurations with clarity. For most buyers, the standard chiminea delivers everything a backyard needs without stepping into premium fire bowl territory.
Cast iron chimineas belong to a tradition stretching back centuries, with the design originating in 16th-century Mexico as a portable cooking and heating structure. Its core geometry hasn't changed because it works: the tall neck channels smoke upward and away from seating areas, the heavy base stabilizes in wind, and the front-facing opening concentrates radiant heat directly toward you and your guests.
Contents
- First Fire or Hundredth: Matching the Iron Embers to Your Experience Level
- Clearing Up the Biggest Misconceptions About Cast Iron Chimineas
- Simple Tweaks That Immediately Improve Your Chiminea's Performance
- The Honest Assessment: What the Iron Embers Chiminea Fire Pit Delivers
- Frequently Asked Questions
First Fire or Hundredth: Matching the Iron Embers Chiminea to Your Experience Level
What New Owners Need to Get Right From Day One
If this is your first chiminea, the learning curve is shorter than you expect — but beginner mistakes are consistent enough to warrant specific attention. Curing the cast iron before your first full fire is non-negotiable; skipping this step causes thermal shock that can permanently crack the body.
- Build three small, progressively larger fires over three consecutive sessions before running a full-size burn.
- Apply a thin coat of vegetable oil or high-heat spray to the interior after each curing fire while the metal is still warm.
- Keep the opening facing away from prevailing wind during early burns to prevent flare-ups that stress uncured joints.
- Place the chiminea on a level, non-combustible surface — concrete pavers or a flagstone pad provide stability and add a polished aesthetic element to your backyard layout.
- Never burn treated wood, cardboard, or trash in a cast iron chiminea; chemical residues degrade the protective seasoning layer faster than normal use.
How Experienced Burners Maximize Cast Iron Performance
Once you've completed curing and logged several sessions, you can push the iron embers chiminea fire pit toward its performance ceiling. Experienced users shift focus from basic operation to fuel density, airflow management, and seasonal preparation.
- Load dense hardwoods like oak or hickory in a teepee stack — they burn hotter and longer than softwoods and produce significantly less creosote buildup in the neck over time.
- If your model includes an access door, crack it slightly to regulate oxygen flow, which extends burn time and produces a cleaner, hotter flame.
- Use a cast iron grate inside the firebox to elevate fuel above ash, which improves combustion by allowing consistent airflow from below the burning wood.
- Pair your chiminea with weather-resistant outdoor furniture positioned within the directional heat arc; a solid outdoor sectional guide helps you choose pieces that hold up near a sustained heat source without warping or fading.
Pro tip: Seasoned hardwood with a moisture content below 20% burns up to 30% hotter than green wood — invest in an inexpensive moisture meter if you buy firewood in bulk quantities.
Clearing Up the Biggest Misconceptions About Cast Iron Chimineas
The Rust Problem Is Significantly Overblown
The single most common reason people hesitate before buying a cast iron chiminea is rust anxiety — and it's rooted in a misunderstanding of how this material actually behaves under normal outdoor conditions. Surface rust is cosmetic, not structural, and it's easily reversed with a wire brush and a fresh coat of high-heat stove paint. According to Wikipedia's overview of cast iron, the material's density and carbon content make it highly resistant to penetrating corrosion, unlike mild steel, which rusts through from the inside out under the same conditions.
- Cover the chiminea or move it under a porch overhang during extended periods of rain to minimize standing water in the firebox.
- Re-season the exterior once per season with high-heat spray paint rated for at least 1,200°F to maintain a consistent protective barrier.
- Surface oxidation appearing orange or brown after wet weather brushes off cleanly and signals zero structural compromise.
You're Not Limited to Firewood
Many owners assume a chiminea is wood-only, but cast iron handles a wider range of solid fuels than most people realize. The key variable is temperature control and ventilation, not material compatibility.
| Fuel Type | Heat Output | Burn Duration | Smoke Level | Recommended? |
|---|---|---|---|---|
| Seasoned Oak / Hickory | High | 2–4 hours | Low | Yes — optimal choice |
| Kiln-Dried Softwood | Medium | 1–2 hours | Medium | Yes — good starter fuel |
| Wood Pellets (contained grate) | Medium-High | 1–3 hours | Very Low | Yes — clean burn option |
| Charcoal Briquettes | High | 2–3 hours | Low | Caution — open air only, CO risk |
| Green or Wet Wood | Low | Variable | Very High | No — avoid entirely |
| Treated or Painted Wood | Unpredictable | Short | Toxic | Never — damages unit and harmful |
Warning: Never burn charcoal in an enclosed or partially sheltered area — even in an open-neck chiminea, charcoal produces enough carbon monoxide to pose a serious health risk without substantial open-air ventilation on all sides.
Simple Tweaks That Immediately Improve Your Chiminea's Performance
Getting the Perfect Burn Every Time
Most disappointing chiminea sessions come down to poor fire-building technique rather than equipment failure. Follow this sequence consistently and your iron embers chiminea fire pit will deliver clean, sustained heat from the first match every time.
- Clear ash from the previous session, but leave a thin layer — roughly half an inch — as an insulating bed that protects the firebox floor and improves combustion efficiency.
- Place two fire starters or a handful of dry tinder at the center of the firebox, arranged loosely to allow free airflow through the material.
- Build a small teepee of dry kindling over the tinder — pencil-diameter sticks catch faster and more reliably than thick splits at this critical early stage.
- Light the tinder and let the kindling catch fully before adding any logs; rushing this step produces smoke, incomplete combustion, and frustration every time.
- Add splits one at a time, waiting 3–5 minutes between additions to maintain a controlled, oxygen-rich burn that doesn't choke itself out.
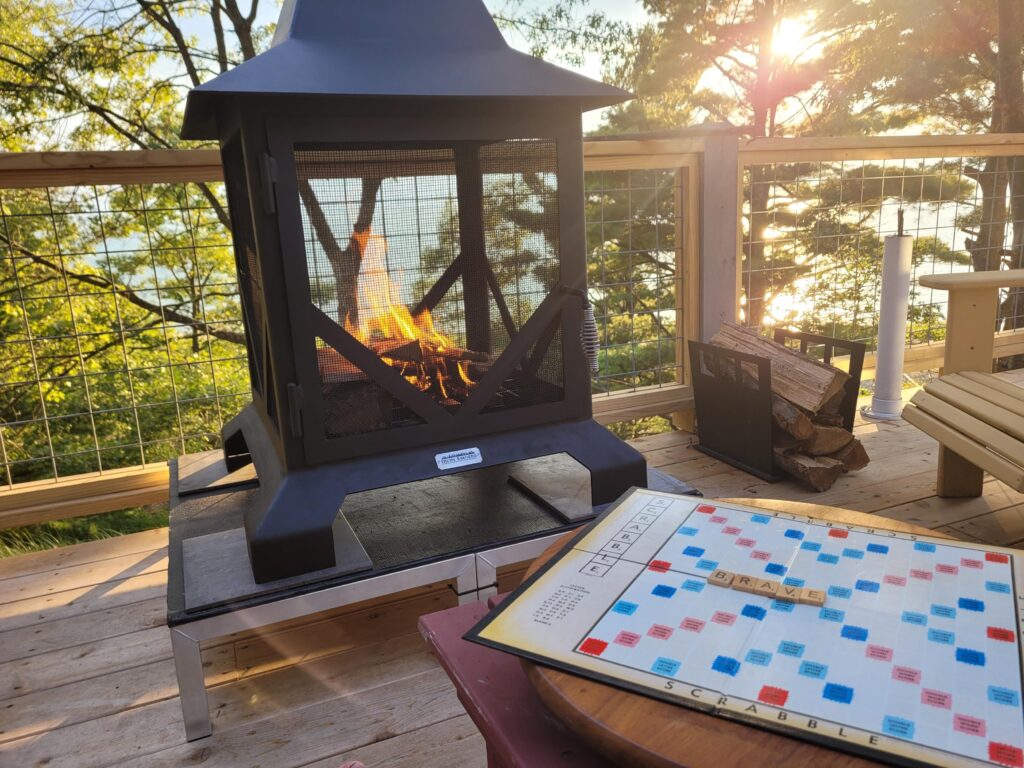
- Position seating within 5–8 feet of the opening, where radiant heat output from the cast iron body peaks during the middle phase of a long burn.
Protecting Your Investment Long-Term
A properly maintained Iron Embers chiminea lasts 15 years or more — but most premature failures trace back to one or two skipped maintenance steps that take under 30 minutes per season to complete.
- Clean the firebox and neck interior with a long-handled brush at the start and end of each season to remove creosote deposits before they harden into a structural problem.
- Inspect all joints and welds for hairline fractures after the first cold-weather contraction cycle; seal any cracks you find immediately with high-temperature furnace cement before thermal cycling widens them further.
- Avoid positioning the chiminea directly adjacent to container gardens during peak burn sessions — if you're already planning to move tender plants outdoors for summer, factor the chiminea's 5-foot radiant heat radius into your placement decisions.
- Re-black the exterior annually with stove paint, which simultaneously protects the metal surface from oxidation and keeps the unit looking sharp season after season.
The Honest Assessment: What the Iron Embers Chiminea Fire Pit Delivers
Where This Chiminea Genuinely Excels
When you compare the Iron Embers chiminea directly against competitors in the same price range, several qualities consistently separate it from the field in ways that matter over multiple years of ownership.
- Heat retention: Cast iron stores thermal energy and re-radiates it for 30–45 minutes after the last log burns down, keeping your outdoor space warm through the natural cooling-down period without feeding additional fuel.
- Smoke management: The elongated neck channels combustion gases upward more efficiently than low-profile fire bowls, making this a significantly better choice for enclosed patio areas where smoke direction matters.
- Structural durability: Heavy-gauge cast iron doesn't warp, dent, or corrode through the way thinner steel competitors do under repeated thermal cycling across multiple seasons of use.
- Aesthetic versatility: The traditional chiminea silhouette integrates naturally with most backyard design languages — it works as well alongside natural stone and container gardens as it does on modern composite decking.
Where It Falls Short
No product is perfect, and understanding the iron embers chiminea fire pit's drawbacks before purchase saves you from buyer's remorse on a significant investment.
- Weight: Most cast iron models weigh 40–75 lbs depending on size, which makes repositioning a two-person job and rules out rooftop decks or structures with strict weight limits.
- Upfront cost: Cast iron commands a real price premium over clay and steel alternatives — entry-level models start around $300, with larger configurations exceeding $600 at retail.
- Slow warm-up: Cast iron takes 15–20 minutes to fully heat through, noticeably longer than thin steel fire bowls that radiate heat within minutes of ignition on cold evenings.
- Directional heat: The front-facing opening concentrates warmth in roughly a 90-degree arc — guests seated to the sides or rear receive substantially less radiant heat than those positioned directly in front.
Frequently Asked Questions
How do you cure a cast iron chiminea before the first use?
Build three progressively larger fires across three separate sessions, keeping each burn small and controlled. Between sessions, apply a thin coat of vegetable oil or high-heat spray to the warm interior surfaces, which builds up a protective seasoning layer that prevents cracking when you run your first full-temperature fires.
Can you leave a cast iron chiminea outside year-round?
You can, but you need to protect it during extended wet periods. Cover it during prolonged rain and never allow standing water to pool inside the firebox — water that freezes inside cast iron expands under pressure and causes stress fractures at the base joints across multiple freeze-thaw cycles.
What wood burns best in an iron embers chiminea fire pit?
Seasoned hardwoods — oak, hickory, or maple with moisture content below 20% — deliver the best results: high heat output, long burn times, and minimal creosote production. Kiln-dried softwood works as a secondary option but burns faster and produces more smoke than well-seasoned hardwood at comparable volume.
How far should a chiminea be placed from combustible surfaces?
Maintain a minimum of 10 feet from your home exterior, fencing, or any combustible structure. Keep 3 feet of clearance on all sides from furniture, plants, and overhead features. Always check your local fire codes, since some municipalities enforce stricter setback requirements than the manufacturer's baseline recommendations.
Can you cook food in a cast iron chiminea?
Yes, with the right setup. A cast iron grate positioned inside the firebox converts the chiminea into a functional cooking platform suitable for skillet meals, direct grilling, or Dutch oven cooking. Use only untreated hardwood or food-safe lump charcoal when cooking — never briquettes treated with lighter fluid or chemical starters.
How do you remove rust from a cast iron chiminea?
Wire-brush the affected area to remove loose oxidation, wipe it clean with a dry cloth, and apply two coats of high-heat stove paint rated for 1,200°F or higher. Surface rust on cast iron is cosmetic rather than structural and does not indicate a compromised unit — consistent re-blackening every season prevents most rust formation before it starts.
The iron embers chiminea fire pit rewards the owners who respect it — cure it right, fuel it correctly, and maintain it seasonally, and it will outlast every cheaper alternative you almost bought instead.


About William Murphy
William Murphy has worked as a licensed general contractor in Fremont, California for over thirty years, specializing in outdoor structures, green building methods, and sustainable design. During that career he has written about architecture, construction practices, and environmental protection for regional publications and trade outlets, bringing technical depth to subjects that most home improvement writers approach only from a consumer perspective. At TheBackyardGnome, he covers outdoor product reviews, backyard construction guides, and sustainable landscaping and building practices.
You can Get FREE Gifts. Receive Free Backyard Items here. Disable Ad Blocker to get them all now!
Once done, hit anything below