Pothos Plant Care – Your Complete Guide
by William Murphy
Pothos plants come in many varieties, from deep greens, to bright neon greens, solid to striped, flat green, to even sparkly blues.
Pothos plants are amazing (this might be a scientific fact, but it is definitely my personal opinion as well!). Caring for them is a very particular process, which is why we came up with this guide to looking after Pothos plants.
Refer to the table of contents below to get around the article quicker. Click the link and it’ll take you where you want to go!
Table of contents:
- General Pothos Plant Care
- Watering
- Light
- Types of Pothos Plants
- Golden Pothos
- Neon/Lime Pothos
- Marble Queen
- Jessenia Pothos
- Cebu Blue Pothos
- Pearls and Jade Pothos
- Manjula Pothos
- Pothos Propagation
- Problems
- Root Rot
- Pests
General Pothos Plant Care
Watering
With most plants, I can’t stress enough that less is more. Similar to us humans, it takes a lot longer to die of dehydration than of drowning, so underwater- don’t overwater.
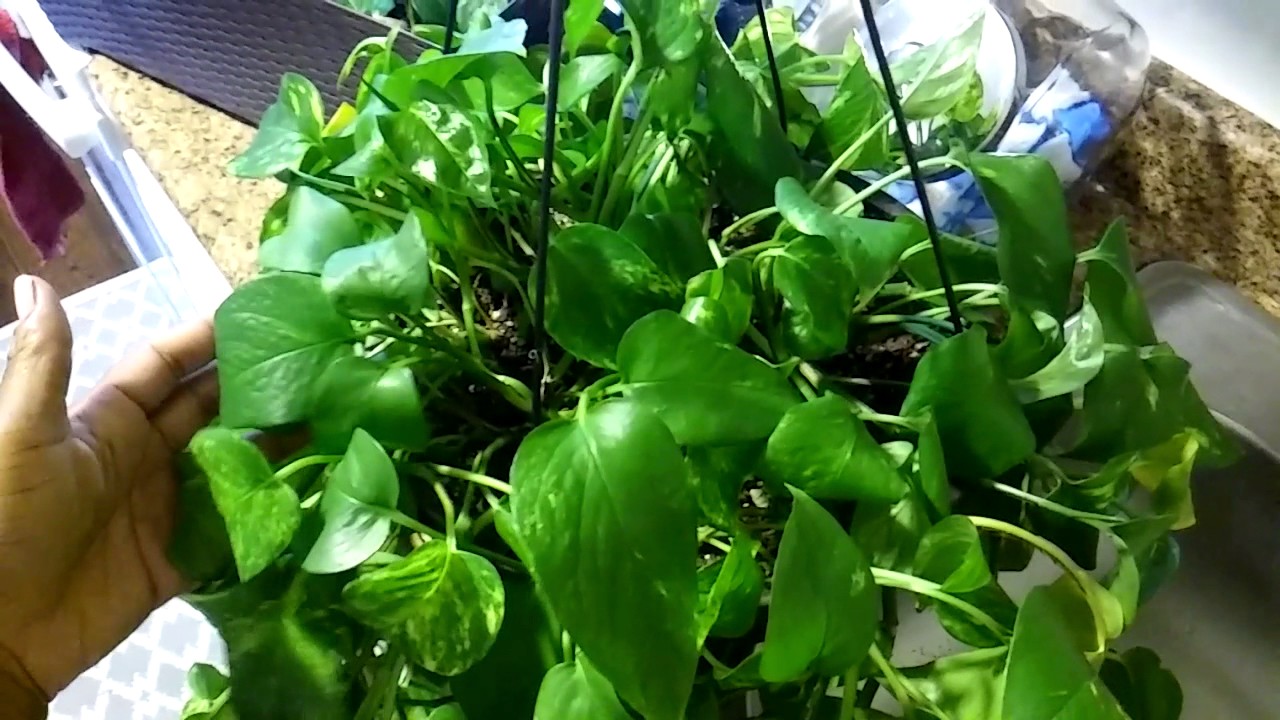
Pothos plants are incredibly forgiving, but as a general rule, I like to water my pothos plants every 2-3 weeks, or when the top inch or two of soil is dry. Don’t water the plant if the soil is still wet.
Be sure to keep these in a pot with good drainage – holes at the bottom of the pot for water to escape, or if you want to put it in a sealed pot, place a combination of medium sized stones (that you might find at your local dollar store) and aquarium gravel (or just smaller stones).
This will help keep the plant from growing roots in the bottom of the pot and potentially developing root rot from sitting in a puddle of water or soggy soil.
Root rot is a quick and easy way to kill your plant, and I’ll talk more about it later in this article.
Light
Pothos plants are amazing, and are happy with just about any amount of light!
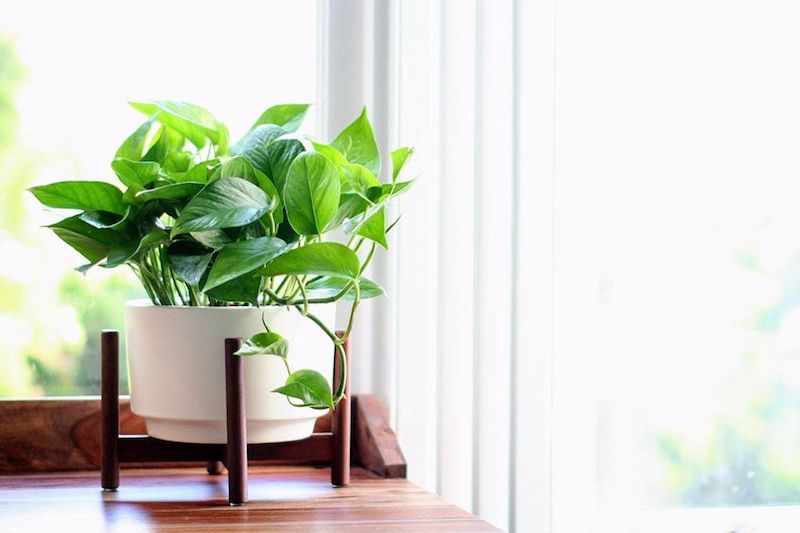
I have some hanging in windows, and some in the dark corners of my living room, and all look happy, but as a general rule keep in low to bright indirect light!
If you leave pothos plants in direct sunlight the leaves can burn, so be careful! If you see the leaves drying out and turning yellow/brown, chances are they are burning (but also be sure to check that the soil is not soggy and the real issue is not root rot!)
Here’s another great video by the amazing NaturalGreenThumb sharing some tips on how to make your pothos bushier. Love the plant in this video, and obviously getting the right light for these plants has a lot to do with their overall health and well being.
Types of Pothos Plants
There are so many different kinds of pothos plants – you’ve got to love the variety! In this section I want to talk a little bit about each of the ones that I’ve come across.
Golden Pothos
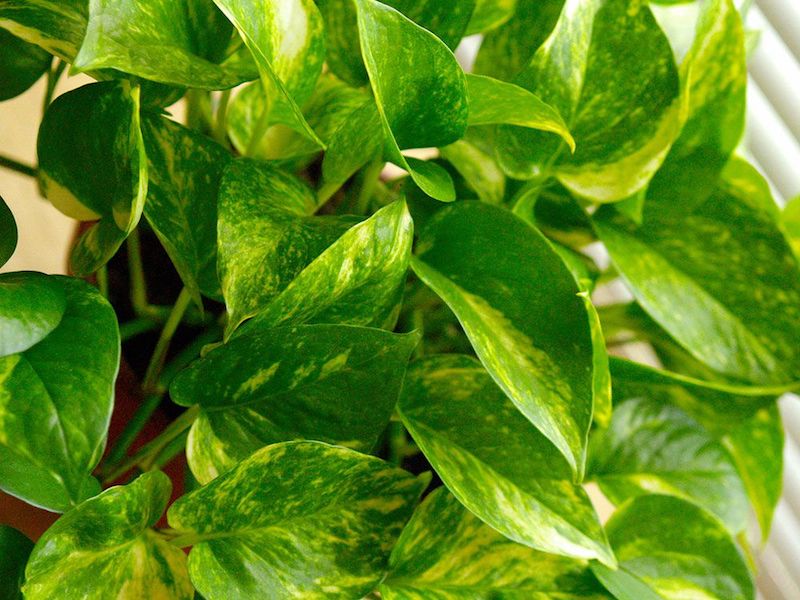
Golden Pothos (or Epipremnum Aureum) is one of the most common Pothos varieties. Often mislabelled as a Philodendron, the Golden Pothos has heart shaped, deep green leaves, with splashes of yellow-white throughout.
Golden Pothos can be taught to climb up a moss pole or left to trail in a hanging planter, or on a shelf. When grown outdoors, in warm areas, the leaves can grow to be a foot (12”) or more in WIDTH!
One of the reasons Golden pothos plants are so popular is that they can thrive in very low light conditions.
In lower light, they keep a deeper green leaf colour, where in brighter light they will develop more variegated leaves.
Be cautious and keep an eye on these plants in bright light, and avoid direct light as leaves can burn.
Neon/Lime Pothos
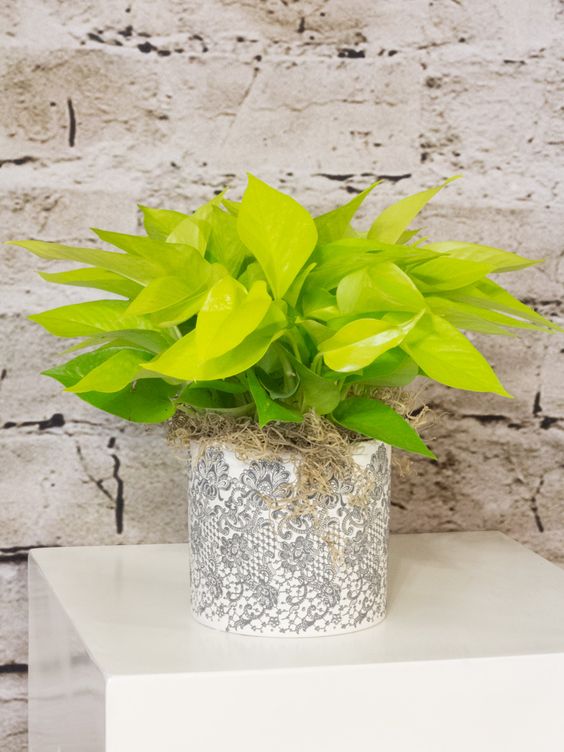
Neon Pothos (Epipremnum Neon) is one of the easiest varieties to identify as it has the one of the most distinct colours. Its leaves are bright golden yellow-green, and are not variegated like many other pothos variety.
As this plant ages, the leaves deepen and darken in colour, while its newest leaves stay a bright yellow! When grown in bright light, the plants colours become a bright yellow-green.
Similar to a Golden Pothos, the leaves darken when grown in low light conditions.
Marble Queen/ Marble Pothos
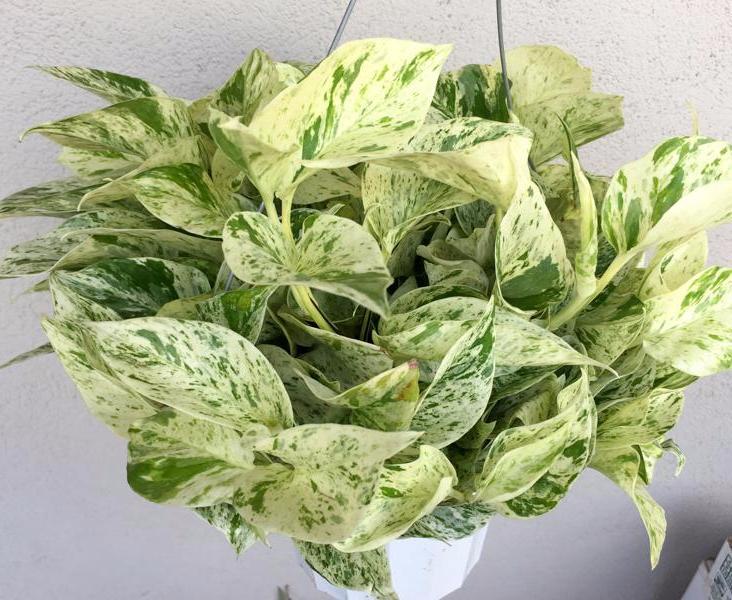
Similar to Golden Pothos, Marble Queen Pothos (Epipremnum Aureum Marble) has heart shaped, green/white variegated leaves.
Depending on the particular piece it was propagated from, the leaves can be more or less variegated, ranging from mostly green with small white streaks to almost entirely white leaves.
This is actually not ideal, as amazing as it looks, as plants need to have green (chlorophyll) on/in their leaves in order to photosynthesize properly, and absorb all the nutrients it needs).
Jessenia Pothos
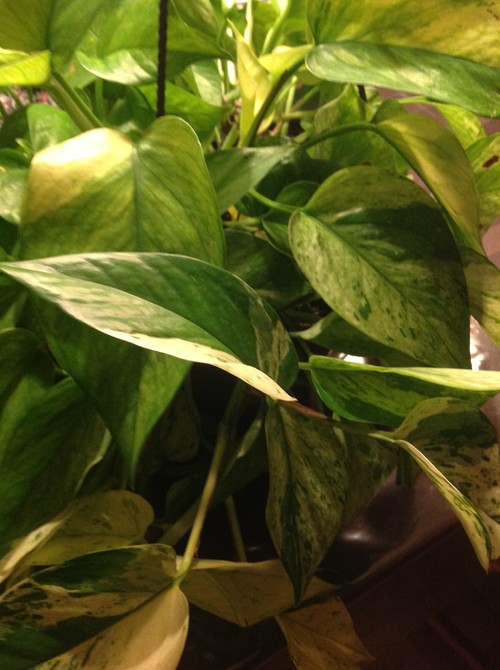
Jessenia Pothos (Epipremnum Jessenia) has heart shaped, green leaves with creamy white to yellow variegation. Similar to Marble Queen Pothos, these leaves are heavily variegated, however the Jessenia Pothos often has more subtle and smooth colour changes.
When side by side, Marble queen Pothos and Jessenia Pothos can often be easily distinguished, given the difference in their level and style of variegation.
Marble is often a much lighter variegation (clear white), while Jessenia is a creamy white – yellow variegation. Although similar in shape to Golden Pothos, Jessenia Pothos often grows more slowly.
Cebu Blue Pothos
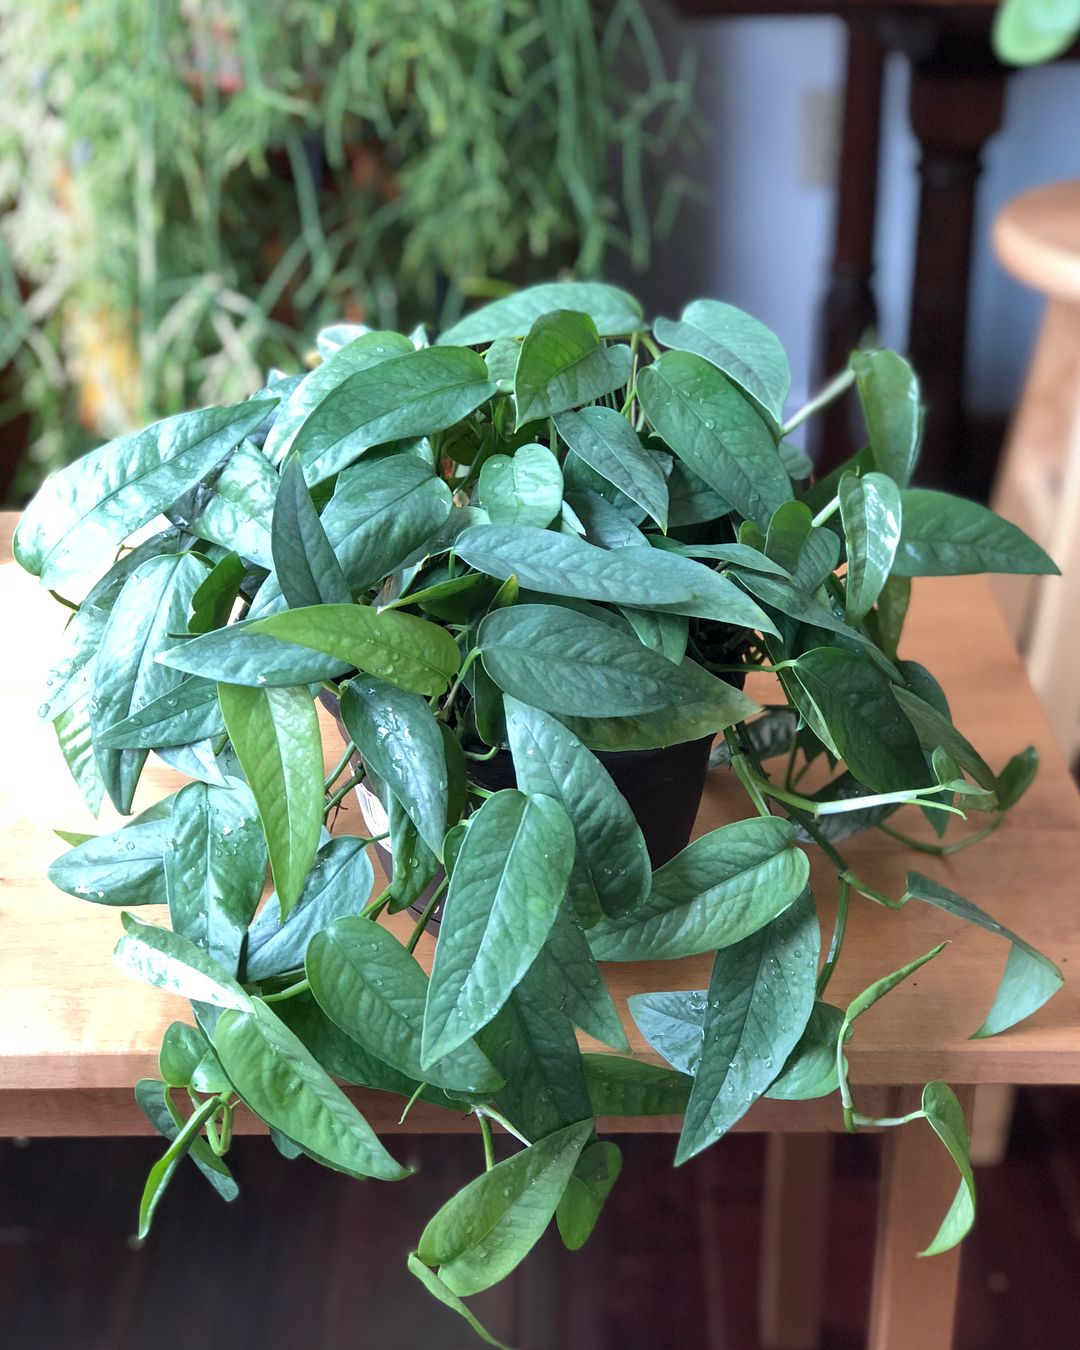
Cebu Blue Pothos (Epipremnum Pinnatum ‘Cebu Blue’) is one of the most amazing of the pothos varieties.
Known for their deep blue-green foliage, and deep splits in the leaves of mature plants (similar to a Monstera Deliciosa or Adansonii) the Cebu Blue is one of the more rare, and prized, pothos variety.
These beautiful plants have a metallic sheen to their arrowhead shaped leaves, and thrive in warm, bright spaces with some humidity.
They take a long time to develop the split leaves, but once started, quickly become a favourite for plant lovers.
Pearls and Jade Pothos
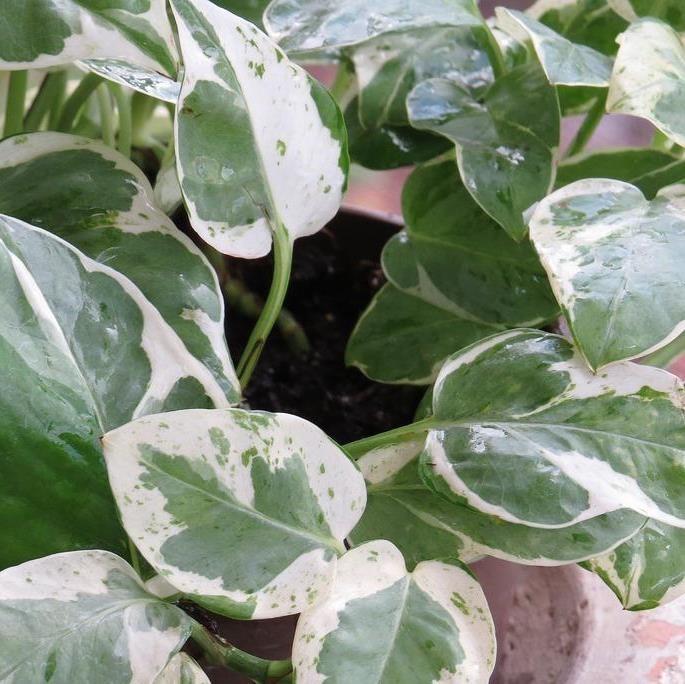
Pearls and Jade Pothos (Epipremnum Pearls and Jade) are one of the more distinct pothos variety, known for their eye catching silvery-grey and white variegated leaves.
The leaves tend to appear more variegated at the edge, with green and silver-grey speckles throughout the white variegation.
Pearls and Jade Pothos plants tend to produce smaller leaves, at a slower rate than many other pothos varieties.
Manjula Pothos
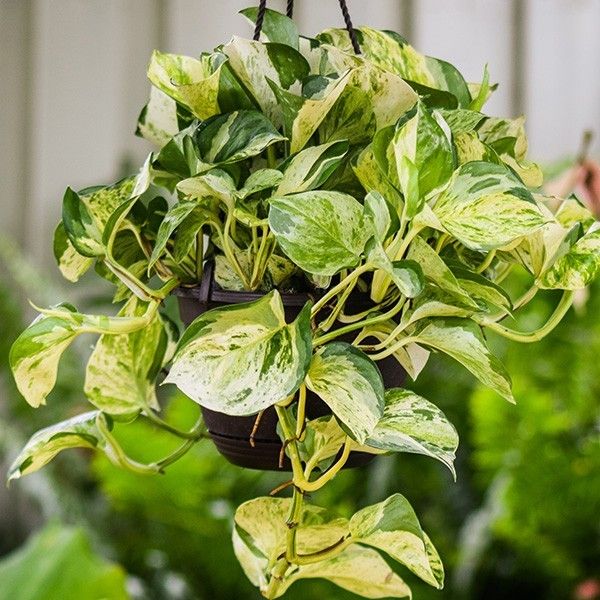
The Manjula Pothos (Epipremnum Manjula) has leaves similar to those of a Marble Queen Pothos and a Jessenia Pothos.
The foliage is a variegated combination of light and dark greens, white, cream, and silver patches.
Unlike many pothos, these leaves tend to curl and look wavier than most.
Pothos Propagation
Pothos plants propagate insanely easily, so if you buy one pothos plant, do yourself a favor and try to propagate them – you will soon have a house full of them!
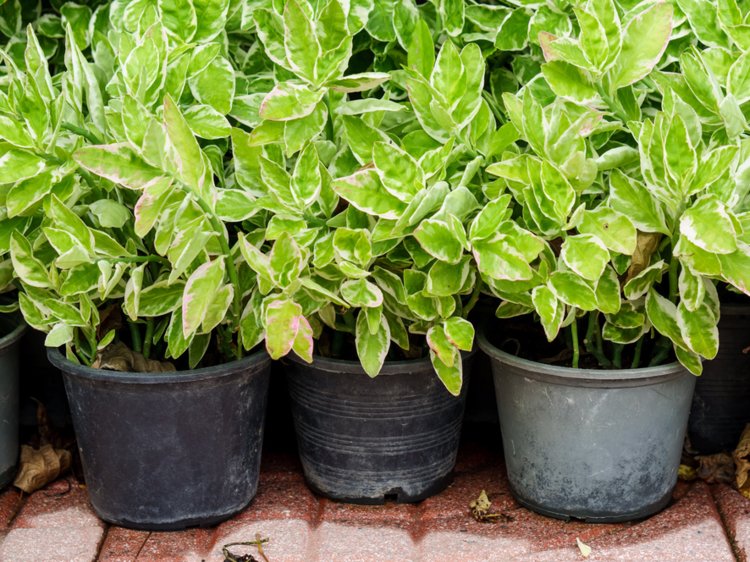
To propagate a pothos plant, start by finding the end of the vine. I like to take a few leaves, so once you find the last leaf, count back two to four leaves, and cut just below the split.
If you can find a node/aerial root (basically a small root growing mid vine), and cut just below that. These roots will grow much quicker than starting a new one, but it will grow roots even without a node.
Once you have taken your cutting, you’re going to want to stick it in a glass of water (I like using old spice jars, or test tubes because they look super cute).
If any leaves are under water, they will likely die and fall off (this is fine and normal, and once they start to turn yellow or brown I like to just pull them off to avoid the plant rotting). Depending on the season, you will start to see roots in a couple days to a few weeks.
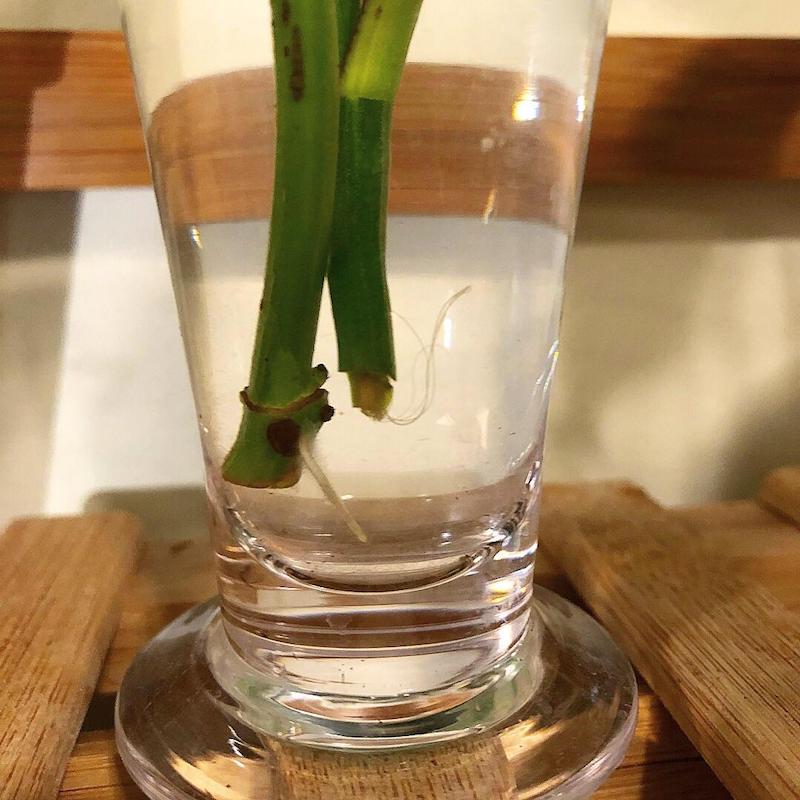
From here, you can decide whether you want to keep your plant in water (pothos plants are an amazing species and can actually live and thrive in water when given the proper nutrients) or plant into soil. (I like planting mine in soil because I love picking cute pots for my plants!)
For the first few weeks, you’re going to want to make sure you water it more often, as it can be shocking for the plant to be taken from sitting in water to dry soil.
Alternatively, you can plant the cutting directly into soil, and water it more frequently to help it to establish roots.
The downside to this is that you can’t see the roots forming (which can be pretty amazing!), but on the other hand this way is nice because you don’t risk shocking the plant in the transition.
Personally, I prefer rooting the plant in water, and have never had a problem shocking the plant.
One major issue you might face in propagating can be the plant dying or dropping leaves from a lack of humidity. Before the plant has established a root system, it will struggle to keep its humidity up.
I’ve had pothos plants turn black and drop every single leaf on its vine because I decided to propagate in winter, near a heater, out of a bottle of water.
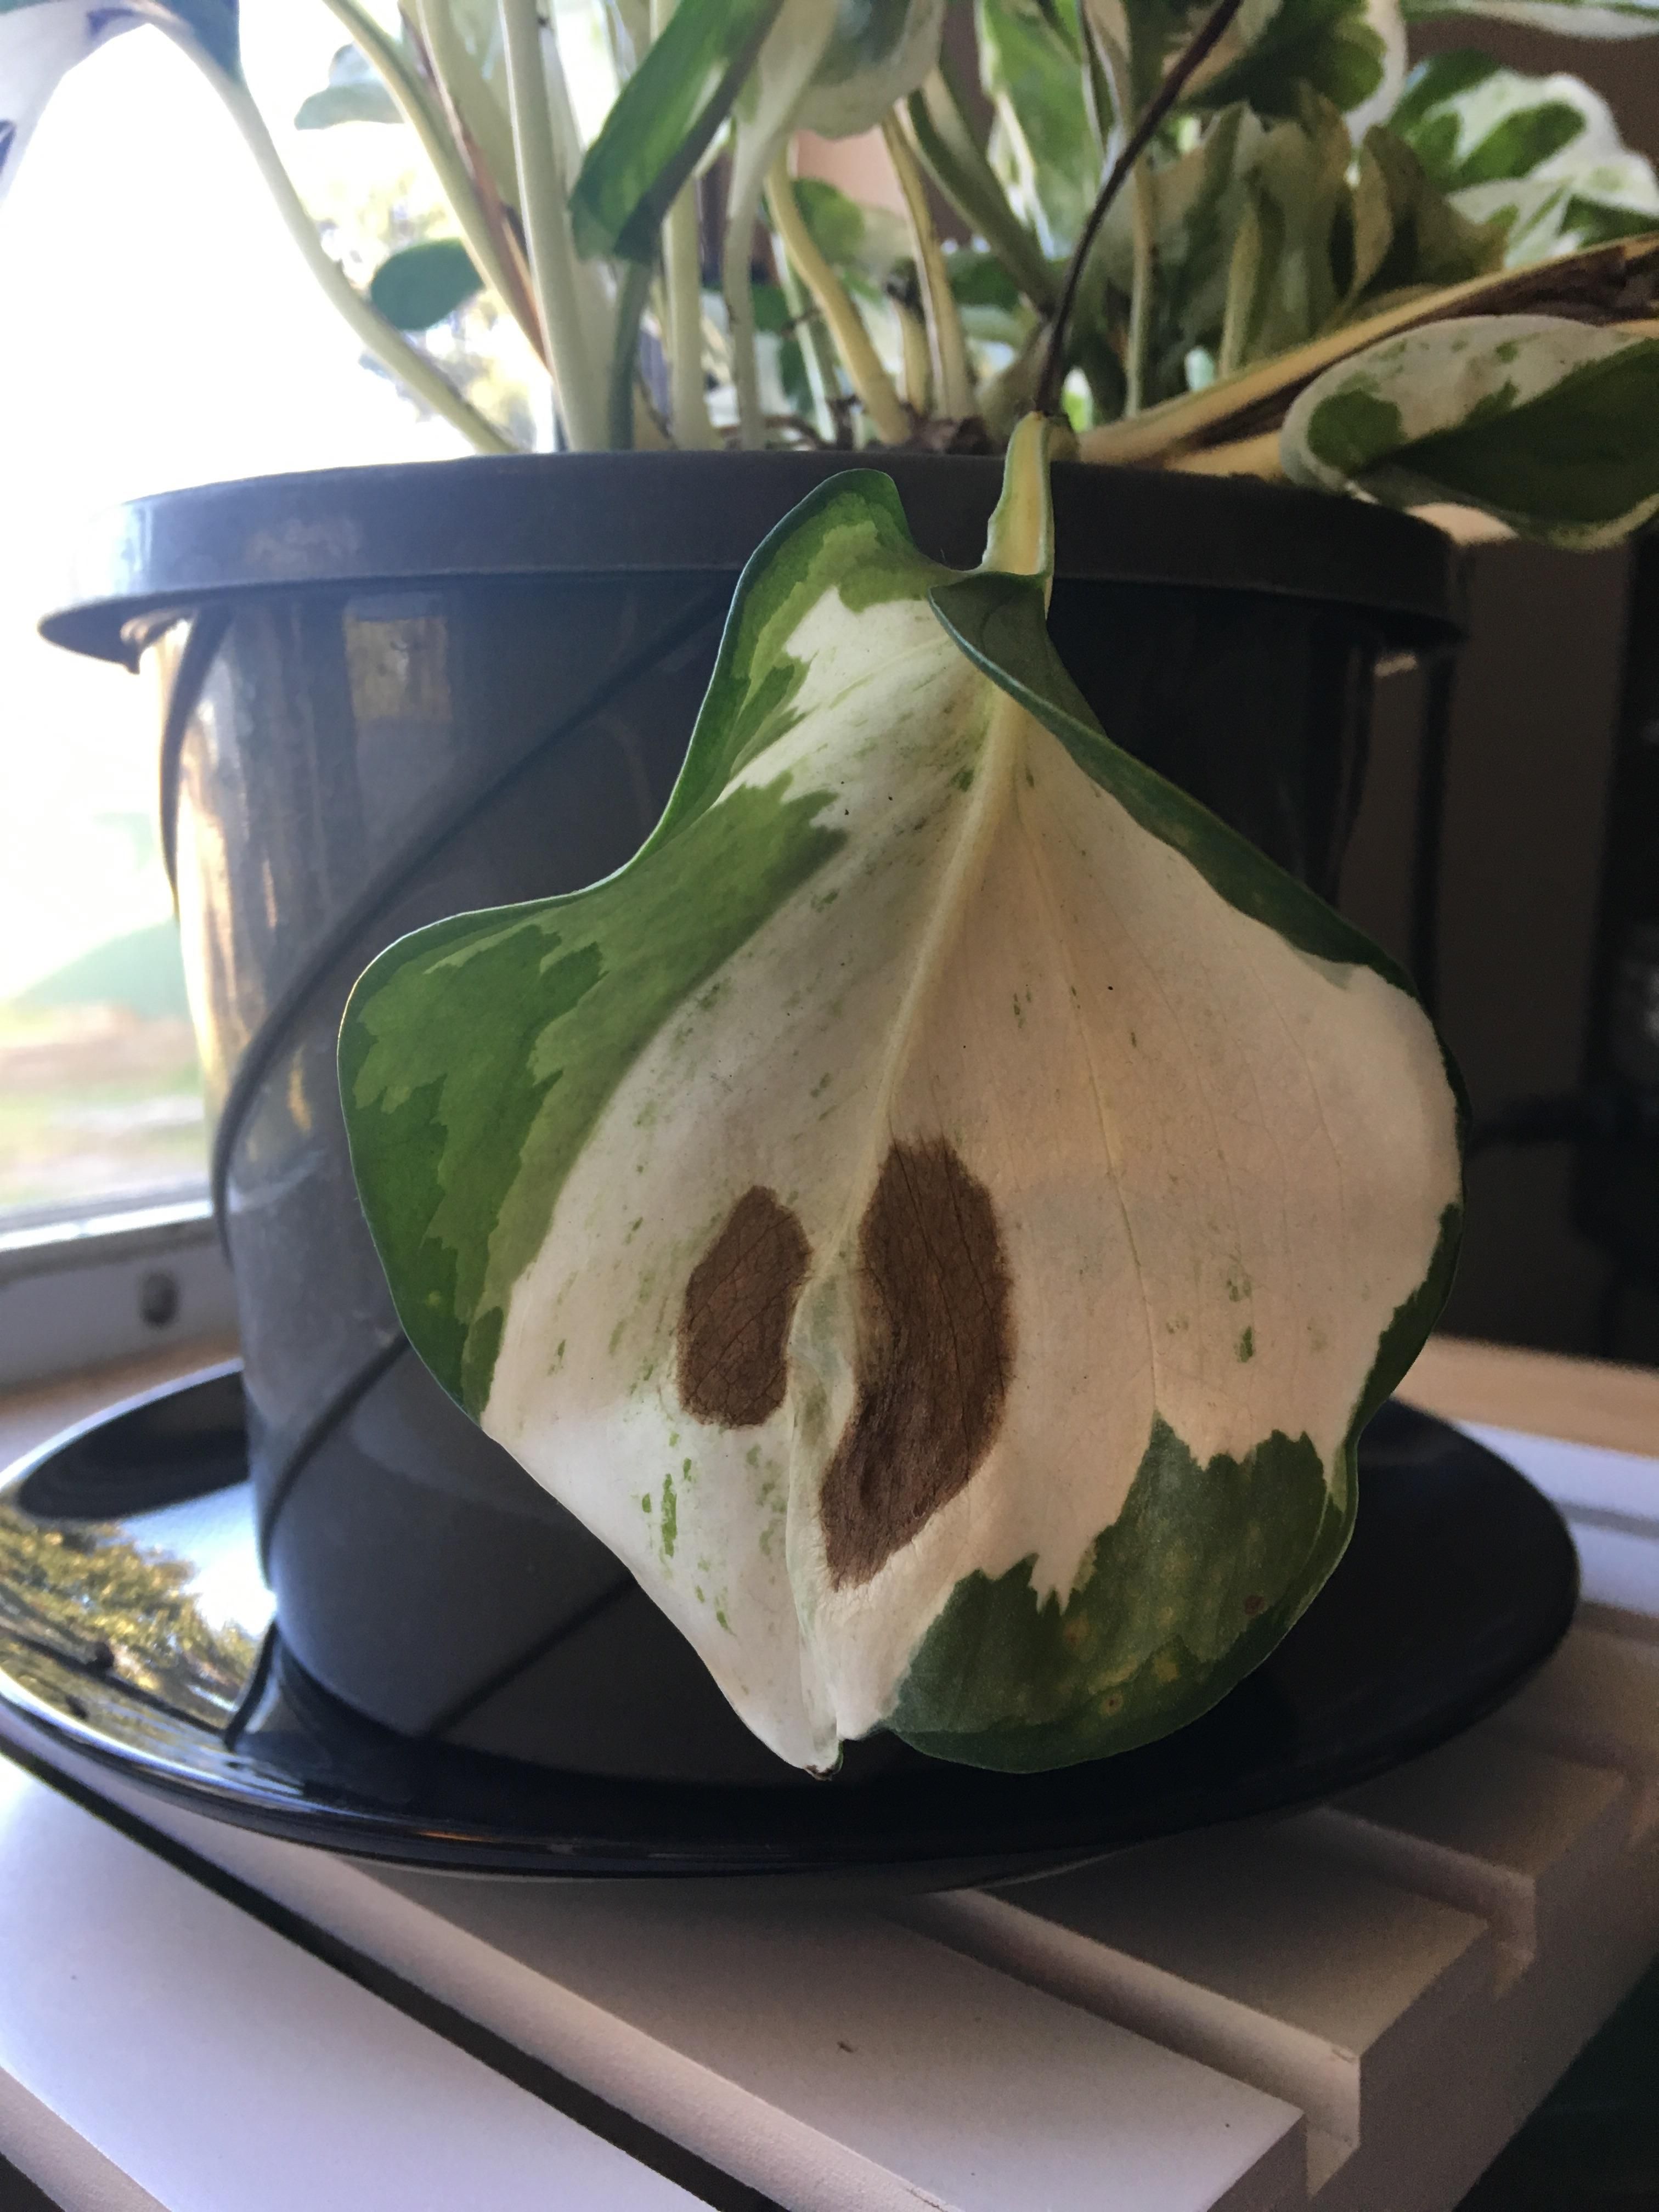
If you notice this happening, it’s important to increase the plants humidity, as well as light exposure (but be careful not to burn the plants leaves).
Putting the plant in a greenhouse will fix this, but if you don’t have access to a greenhouse you can try filling a 2L pop bottle about 1/8th with water and sticking the vine in it, making sure the end of the vine is submerged in water.
Leave the lid off to allow for a bit of ventilation. Another cute way to increase your plants humidity is to build a small terrarium.
Here is maybe my favourite propagation video about pothos plants, by EasyGroHydro. Have a look!
Problems
Keeping your pothos plants looking vibrant and healthy is the main goal, always, but sometimes we run into issues and they can be a real pain in the keester to deal with.
I want to talk about the main two issues I run into, being root rot and pests.
Root Rot
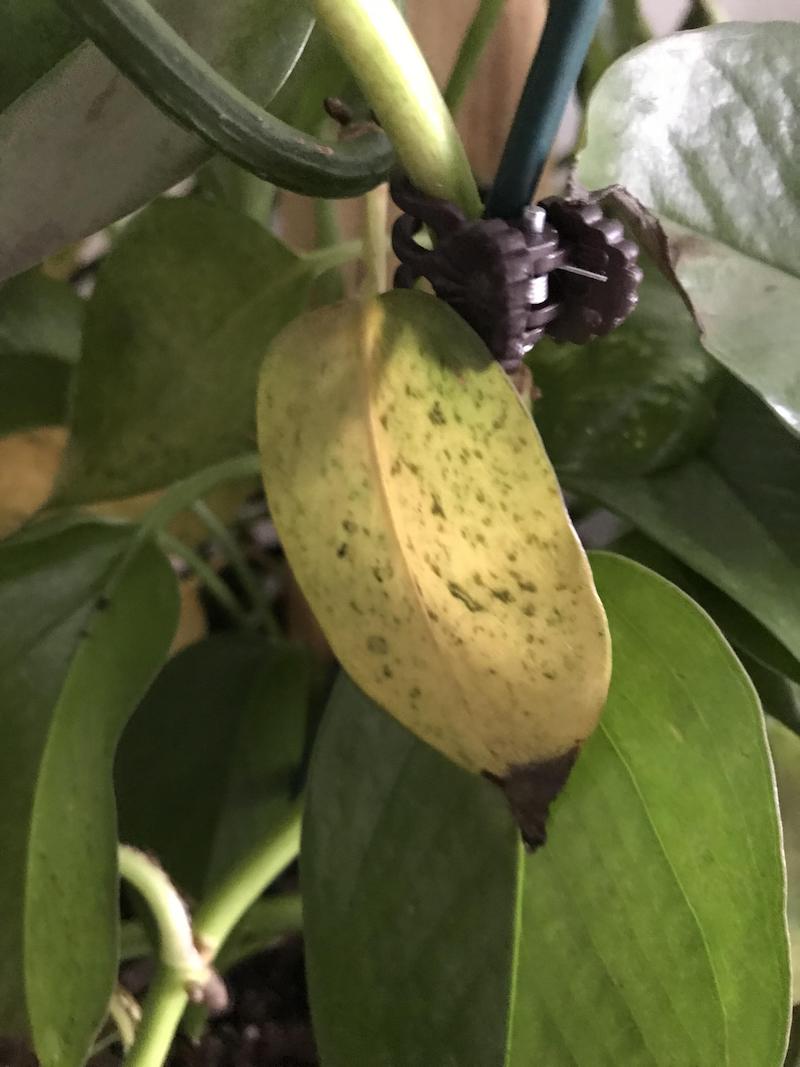
Root Rot occurs when the roots of your pothos plant are left to soak in water under the wrong circumstances. You never want to leave your pothos plant sitting in soggy soil, this will cause root rot.
If your pothos plant is looking limp and dying, root rot may be the culprit. To avoid letting the entire plant die, uproot the plant to check the roots.
If the roots are rotting you will see them turning black/brown, and they will look soggy. It’s important to catch root rot as soon as possible, because if left untreated it will kill the plant.
To save a plant from root rot, start by cutting off all affected areas. If the plant still has some roots, you can stick it back in a pot with some fresh soil and good drainage, and this time be sure not to overwater it.
If the plant has no healthy roots, or even is starting to die throughout the vines, don’t worry- you can still save part of it.
Cut off all healthy parts of the plant, and propagate them! If you’ve never propagated a pothos plant before, this may be a blessing in disguise, as you will soon have tons!
Cut them into (approximately) 4-8” sections, and stick them (upright!) in water to root. Check out the section on propagating for more details!
If you are rooting a pothos plant cutting, be sure to check the water everyday to ensure that it has not dried up. When the roots are left to dry up then soak again, they will be more susceptible to root rot.
If you see that the roots have turned brown, cut them off and stick the cutting back in the water again.
I like this video about root rot by Old Planty, talking about how to repair root rot. It has some great tips I’ve put to use myself!
Pests
Pothos plants can be susceptible to a number of different pests, but these are the most common.
Spider Mites
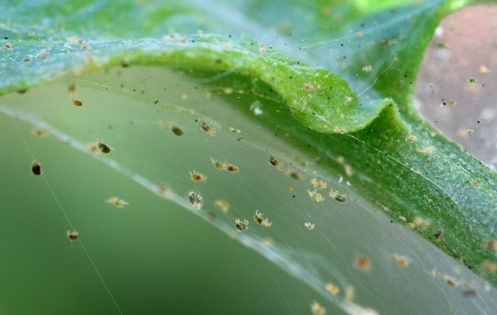
Spider mites are tiny spiders that hangout around the end of a leaf where it connects to the stem, and they suck the life out of your plants!
To combat these guys, make sure you keep your plants humidity up – spider mites like dry areas. You can mist your plants, being sure to spray right around the end and bottom of leaves.
If you notice a spider mite infestation, mix a drop of dish soap into a spray bottle and spray all the spider mites with it. Leave it a day and then rinse the plant off. Repeat as necessary, but be sure not to leave it on too long as the soap can kill your plant.
Fungus Gnats

Fungus gnats look just like fruit flies, and I’m really not convinced they’re any different!
I haven’t actually noticed fungus gnats doing anything particularly destructive to plants (just my sanity!). Their real issue is how incredibly annoying they can be! They fly around your plants, and live in the soil.
To get rid of these guys, you can uproot your plant, set it aside and bake the soil in the oven at the lowest temperature your oven offers, just long enough to kill anything in the soil.
I’ve also heard that lighting a match, allowing it to burn a few seconds, blowing it out and placing it on top of the soil can get rid of them. The last time I saw a few fungus gnats around my plants, I tried it out and weirdly enough I haven’t seen another one since!
To avoid pests, and future outbreaks, I like to quarantine my new plants! I inspect them at the store when I buy them, and try to get ones that seem healthy and without any issues. I bring them home and in the summer I’ll do this outside but in winter I just bring them into the tub and inspect the soil and all the leaves more thoroughly!
If I don’t see anything, I go ahead and put them next to all my other plants, as there’s nothing to worry about, right? NOOOOOO!!!!!!!!
ALWAYS leave your plants separate from the rest for at least a week as if even one bug crawled on and hitched a ride, or laid some eggs it could cause an infestation, and kill all your plants.
I give them an extra week (or month) to make sure that there is nothing to worry about (this gives these pests time to totally take over and show themselves!) and then I can begin treatment once I know what I’m dealing with!
Check out this video by Summer Rayne Oakes, who gives some great tips on plant pest control.
I hope this article helps some of you fellow plant lovers to turn your house into a jungle, or to expand your plant knowledge!
Related posts:
- The History and Evolution of Gardens
- Best Trees for Your Backyard Garden in Southern Ontario, Canada
- The Complete Guide To Succulent Care
- How To Move Indoor Plants Outside In The Summer (And Not Kill Them)
 |
 |
 |
 |

About William Murphy
William has worked as a general contractor in the city of Fremont, CA for over three decades. During that time, he's written articles about architecture, construction, and environmental protection for various publications. He is an expert on green building and sustainable design. When he's not writing or working, William enjoys spending time with his wife and two children.
Thoughts on "Pothos Plant Care – Your Complete Guide"
 |
 |
 |
 |
You can Get FREE Gifts. Receive Free Backyard Items here. Disable Ad Blocker to get them all now!
Once done, hit anything below
 |
 |
 |
 |